
Reviewed · HOBART CITY & WALKING TOURS
Hobart City Sightseeing Tour including MONA Ticket
Hobart looks good from every angle. This day tour strings together a live-narrated city loop, short garden walks, and a relaxing ferry ride before you get MONA entry with a full block of time to make up your own mind in the galleries. The mix of classic Tasmanian sights plus modern, sometimes weird art is exactly the kind of combo that keeps the day from feeling repetitive.
I like that the Hobart portion is built around real landmarks you can recognize later, from Salamanca Place to Battery Point, and it’s explained by local driver-guides who know what to point out and when. I also like that MONA isn’t rushed to the point of stress: you get about three hours to roam, pause, snack, and pick your own pace.
One watch-out: this isn’t a private tour, and at least one stop can feel timing-tight if you’re hoping for lingering coffee breaks. Also, a few people note that the Cascade Brewery is viewed from the outside rather than treated like a full visit, so set your expectations for photos and viewpoints, not a production tour.
In This Review
- Key points I’d plan around
- Why this Hobart + MONA pairing works
- Price and value: what you’re actually paying for
- Meet-up at Brooke Street Pier: your day’s anchor point
- The city tour by coach: Hobart landmarks with real context
- A small caution on expectations
- Cascade Gardens: a quick walk that gives you a feel for the area
- Royal Tasmanian Botanical Gardens: worth it, but manage the clock
- Tasman Bridge and the waterfront drive: the ferry moment starts early
- The Derwent River ferry: transport that earns its place
- MONA entry and your 3-hour window: how to use it well
- The end of the day: back to Brooke Street Pier around 17:30
- Who this tour suits best (and who should skip it)
- Should you book Gray Line Tasmania’s Hobart City Sightseeing Tour with MONA?
- FAQ
- Where does the tour start and end?
- Is hotel pick-up included?
- What’s included with MONA?
- How long do I get inside MONA?
- What language are the guides?
- Will I ride a specific kind of vehicle?
- Can I cancel for a full refund?
Key points I’d plan around
- A structured Hobart loop with multiple photo-worthy stops and live narration from the road
- Cascade Gardens and Royal Tasmanian Botanical Gardens breaks that mix walking with views
- Derwent River ferry time that turns transport into part of the experience
- MONA included with entry plus skip-the-ticket-line convenience
- Three hours at MONA to handle both shocky installations and calmer corners
- Guide names pop up often in feedback, including Brody, Mark, Hugo, Tim, Phil, Evan, Barry, and Craig
Why this Hobart + MONA pairing works
Hobart has two faces. You get the old port-cornered city—crisp streets, docks, hills, and the kind of buildings that quietly explain how Tasmania grew. Then you get MONA, where the theme is challenge: odd juxtapositions, dark rooms, and art that wants you to think instead of just nod along.
This tour is designed for people who want both without spending hours figuring out transport on their own. You’re guided through the parts of Hobart that help you “read” the city—then you’re freed up at MONA to follow your own curiosity. That’s good value for a one-day schedule, especially if you’re not renting a car.
More walks through Hobart, Salamanca and Battery Point
Price and value: what you’re actually paying for
$99 per person for an 8-hour day is a fair price when you look at what’s included: a coach tour with live guiding, entry to MONA, and the ferry return to Hobart. The big win is that you’re not doing the math to buy separate transport legs or MONA tickets later.
On days like this, the cost is mostly buying time and stress reduction. The tour handles the flow between Hobart and MONA, and it gives you enough structure to feel confident you hit the main highlights. If you’d otherwise have to line up ferry times, purchase tickets, and manage a tight day, this is the easier way to do it.
Meet-up at Brooke Street Pier: your day’s anchor point
Your day starts at Brooke Street Pier, and you’ll find the Gray Line day-tours desk inside the Brooke St Pier Building. For me, starting at a central pier matters because it keeps the schedule simple: you’re not waiting around for a pick-up that depends on traffic or multiple hotel locations.
It also helps you gauge the day visually. Before the city portion begins, you’re already at the water, which makes the later ferry crossing feel like a natural step rather than a random add-on.
The city tour by coach: Hobart landmarks with real context
The tour’s first block of time is a live-narrated city loop around Hobart. You’ll see major anchors like Sullivan’s Cove, Parliament House, Salamanca Place, Princes Park, and Battery Point. The guide-style storytelling is the difference-maker here: instead of just pointing at buildings, they connect the dots so you understand why the city grew the way it did.
You’ll also get a set of targeted stops that turn the drive into more than scenery. One highlight is the chance to walk briefly at Cascade Gardens, plus a stop where you can see the exterior of Cascade Brewery and visit the remains of the Female Factory. That last bit is short, but it adds an important human layer to the day.
If you’re a photo person, the itinerary is built for it. You get viewpoints like Rosny Hill lookout, with wide views over Hobart, Sandy Bay, Mount Wellington, the Tasman Bridge, and Glenorchy. The coach route also gives you water-and-dock views at Victoria Dock and Constitution Dock, which makes the later ferry crossing feel earned.
A small caution on expectations
A few people found the Cascade Brewery part didn’t match their idea of a full visit. Based on the way the day is framed here, think of it as an exterior view and a walking stop, not a guided brewery tour.
A few more Hobart trips to weigh before you book:
- Hobart City Sightseeing Tour including MONA Ticket
★ 4.4 · 153 reviews - Hobart: Admission Ticket to Bonorong Wildlife Sanctuary
★ 4.7 · 126 reviews - Full-Day Port Arthur Historic Site Tour and Admission Ticket
★ 4.5 · 85 reviews
Cascade Gardens: a quick walk that gives you a feel for the area
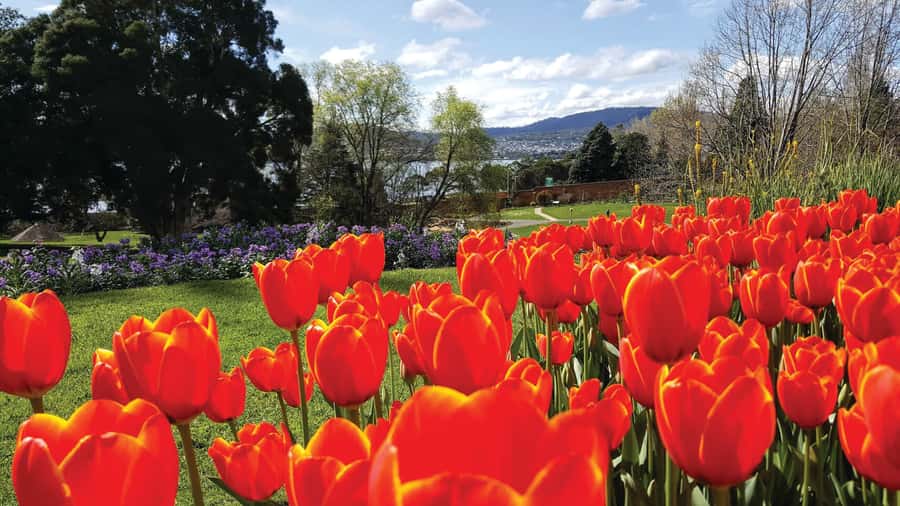
Cascade Gardens is a short window, around 15 minutes, which means it’s not meant to be a full stroll. But it does a clever job: it puts you into “Hobart weather and coastline” mode early, so you’re mentally ready for the ferry later.
Even with limited time, this is a good stop if you want:
- a small break from the bus rhythm
- a chance to stretch your legs
- a scenic reset before the botanical gardens segment
If it’s wet, don’t panic. The day keeps moving on a schedule, and this is exactly the kind of short-outdoor stop that won’t derail your timing.
Royal Tasmanian Botanical Gardens: worth it, but manage the clock
The botanical gardens break is one of the more time-valuable parts of the day, at about 50 minutes. This is where you get both the scenery and the chance to step aside from the “tour bus track” for a moment.
Why I like it for a one-day itinerary: these gardens work as a quiet transition between the city’s built heritage and MONA’s headspace. You get calmer visuals, shaded pathways, and wide outlooks over the harbour area.
One timing note: if you want coffee and a long sit-down, you may feel a pinch of time. A couple of people felt the stop was a bit short for that kind of linger. My advice is simple: go for a walk first, then only grab coffee if you still have minutes left.
Tasman Bridge and the waterfront drive: the ferry moment starts early
Even before you board the ferry, the route sets up the waterfront payoff. You’ll cross and view the area around Kangaroo Bay Marina and Bellerive via Tasman Bridge, then later you’ll see dock areas like Victoria Dock and Constitution Dock.
That matters because the day shifts from city streets to water views with less whiplash. You’ll notice more on the ferry because you’ve already been “taught” where things are from the bus.
If you’re prone to motion sickness, you should be fine, but it never hurts to plan for it like you would on any boat ride. The itinerary keeps the ferry segments relatively short and scheduled.
The Derwent River ferry: transport that earns its place
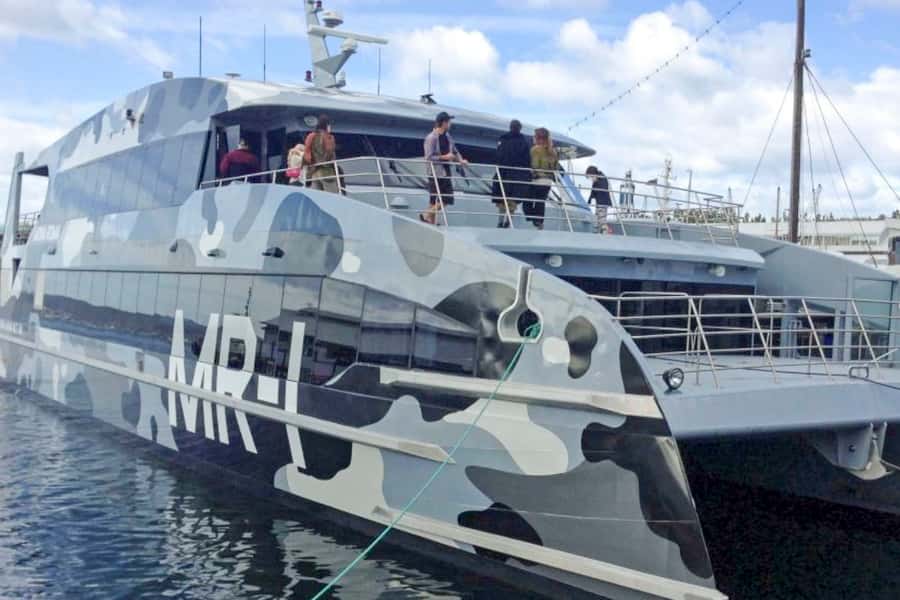
The ferry ride is timed for about 30 minutes each way, with a longer total day arc that includes MONA’s afternoon block. People describe the ferry as comfortable, and honestly, that’s the role it plays here: it gives you a true reset.
On a sightseeing day, a ferry works like a palate cleanser. You stop thinking about logistics, you get sea-breeze air, and you can look at the shoreline instead of just moving past it. It’s also one of those Tasmania details that makes the day feel different from a generic “big city coach tour.”
MONA entry and your 3-hour window: how to use it well
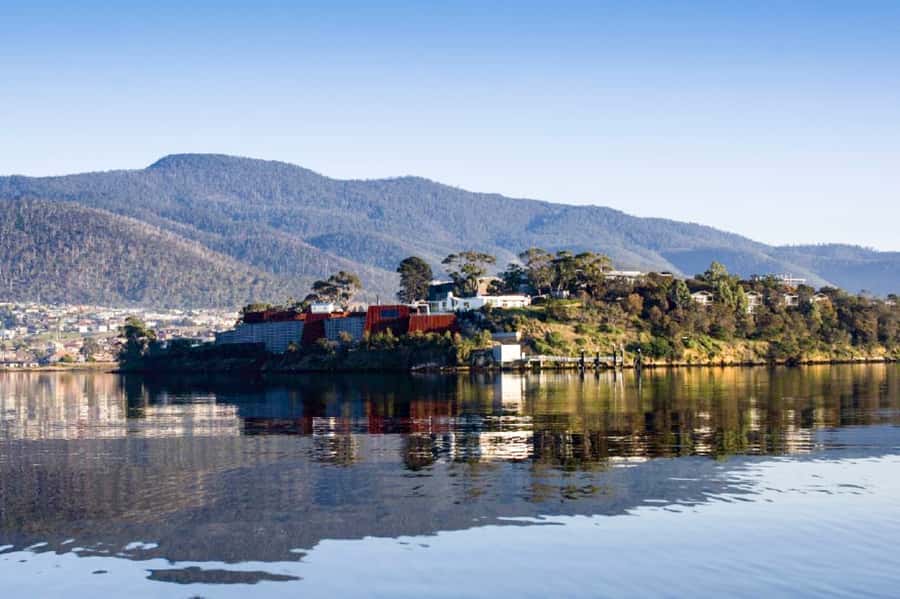
MONA is the star of the second half. You get MONA included entry and a block of about 3 hours of free time. You’re not forced into a strict pace, which is a relief because MONA can take different forms: some areas are darker, some installations can feel confronting, and the building has layers.
Here’s the practical way to plan your time inside MONA:
- Start with the exhibition or collection areas that match your tolerance for weirdness
- Don’t feel guilty skipping anything that isn’t clicking for you
- If you’re sensitive to darker spaces, plan for a few lighter breaks
Some feedback points out that the underground, dim rooms can feel oppressive. If you’re even mildly sensitive to that kind of setting, your best move is to pace yourself and move toward brighter sections when you need a reset.
Also, MONA isn’t only about visual art. People mention an experience that mixes in tech and unusual learning formats, plus food options inside while you’re there. If you’re the type who gets energized by hands-on or surprising interpretations, MONA tends to reward that.
And yes, MONA’s art can be shocking, twisted, and intense. That’s not a marketing line; it’s how the day’s energy is described by people who’ve gone. The upside is that you don’t have to like every piece to still have a memorable afternoon.
The end of the day: back to Brooke Street Pier around 17:30
You return by ferry to Brooke Street Pier, arriving around 17:30. That timing is helpful because it gives you evening flexibility without turning the whole day into a marathon.
If you like walking after tours, Brooke Street’s location makes it easy to keep the day going with dinner and a casual stroll. If you prefer to head straight back, you’re not stuck waiting around for late-night transport either.
Who this tour suits best (and who should skip it)
This tour is a strong fit if you:
- want a first-timer’s Hobart orientation with major stops
- like day structure, not DIY scheduling
- are excited about MONA and want it included without extra ticket hassle
- enjoy ferry views and don’t mind being on a coach for part of the day
It may not be ideal if you:
- want a full brewery tour (Cascade Brewery here is described as an exterior/photo kind of stop)
- hate dark underground museum spaces and would rather avoid that style of environment
- need lots of time to linger with coffee during garden stops
Also, one operational detail matters: the activity notes that for practical reasons, a different vehicle than the converted coach tram may be used. Most people report comfortable transport, but if you’re expecting a very specific tram-style seat setup every day, it’s smart to stay flexible.
Should you book Gray Line Tasmania’s Hobart City Sightseeing Tour with MONA?
I’d book it if you’re doing Hobart for the first time and you want a smart, low-effort way to pair city highlights with MONA. The inclusion of MONA entry and the ferry return makes the $99 price feel more about a guided day than a checklist you have to assemble yourself.
I’d hesitate only if you’re very sensitive to dark indoor exhibits or you’re looking for a slower, more independent MONA day. In that case, you might prefer a MONA-focused plan and add Hobart scenery separately.
If you want one day that’s practical, scenic, and a little left-field in the best way, this is a solid choice.
FAQ
Where does the tour start and end?
It starts at Brooke Street Pier and finishes back at Brooke Street Pier.
Is hotel pick-up included?
No. Hotel pick-up is not included.
What’s included with MONA?
MONA entry is included, and the ticket line is skipped. The ferry return to Hobart is also included.
How long do I get inside MONA?
You get about 3 hours for free time at MONA.
What language are the guides?
The tour guide provides live commentary in English.
Will I ride a specific kind of vehicle?
For operational reasons, other vehicles than the converted coach tram may be used.
Can I cancel for a full refund?
Yes, you can cancel up to 24 hours in advance for a full refund.
More Tours in Hobart
- Bruny Island Food, Sightseeing, Guided Lighthouse Tour & Lunch
★ 5.0 · 2,989 reviews - Full-Day Guided Bruny Island Tour from Hobart
★ 5.0 · 1,331 reviews - kunanyi/Mt Wellington Explorer Bus- Return Tour (2.5 hours)
★ 5.0 · 1,249 reviews - From Hobart: Full-Day Bruny Island Tour with Guide
★ 4.7 · 755 reviews - Day Tour in Mt. Field, Mt. Wellington, Bonorong Wildlife Sanctuary and Richmond
★ 5.0 · 735 reviews
More Tour Reviews in Hobart
- Bruny Island Food, Sightseeing, Guided Lighthouse Tour & Lunch
★ 5.0 · 2,989 reviews - Full-Day Guided Bruny Island Tour from Hobart
★ 5.0 · 1,331 reviews - kunanyi/Mt Wellington Explorer Bus- Return Tour (2.5 hours)
★ 5.0 · 1,249 reviews - Hobart: kunanyi/Mt Wellington Explorer Bus Pass
★ 4.8 · 848 reviews - Bruny Island Traveller – Gourmet Tasting and Sightseeing Day Trip from Hobart
★ 5.0 · 786 reviews
Walking Tours of Hobart
- Hobart History, People & Places – 2 hour city walk
★ 5.0 · 224 reviews - Hobart: 3-Hour City Sightseeing Tour
★ 4.6 · 179 reviews - Shore Excursion: Hobart Highlights Day Tour
★ 4.5 · 107 reviews - Old Hobart Pub Walking Tour
★ 4.5 · 91 reviews - Shore Excursion-Hobart Wanderer
★ 5.0 · 87 reviews
Just Added: Fresh Hobart and Tasmania Reviews




Hobart City & Walking Tours, compared.
 ★ 5.0Hobart History, People & Places – 2 hour city walkFrom $27224 reviews
 ★ 4.63-Hour City Sightseeing TourFrom $46179 reviews
 ★ 4.5Shore Excursion: Hobart Highlights Day TourFrom $107107 reviews
 ★ 4.5Old Hobart Pub Walking TourFrom $2791 reviews
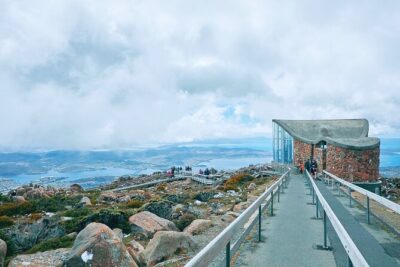 ★ 5.0Shore Excursion-Hobart WandererFrom $11487 reviews
 ★ 5.0Hobart Highlights Day TourFrom $10084 reviews
 ★ 5.0Salamanca Walk – History TourFrom $2881 reviews
 ★ 5.0Hobart Historic Walking TourFrom $2764 reviews
Browse the lists this tour appears in