
Reviewed · HOBART CITY & WALKING TOURS
Shore Excursion: Hobart Highlights Day Tour
If you’ve only got one port day, this is a smart plan. It strings together Hobart’s big hits with Mt Wellington views, a real wildlife stop at Bonorong, and old-town history—without you needing to rent a car.
I especially like the small-group pace (up to 20) and the fact you get pickup and drop-off from the cruise terminal with live commentary along the way. The one thing to watch: the schedule can feel tight if you want long meals or slow browsing, and Mt Wellington is often cold and windy.
In This Review
- Key moments that make this tour worth your time
- Port-day reality: why the Hobart highlights route works
- Mt Wellington (Kunanyi): the summit hit and how to actually enjoy it
- The Salamanca Market stop: the fun (and the limitation)
- Richmond: convict-era streets in about an hour
- Wicked Cheese Co. in the Coal River Valley: quick taste, not a full tour
- Bonorong Wildlife Sanctuary: the animal time you’ll remember
- Guides and pacing: why the small-group style matters
- What you actually get for $107.59
- Weather: the part that can make or break Mt Wellington
- Who this Hobart Highlights Day Tour suits best
- Should you book it?
- FAQ
- How long is the Hobart Highlights Day Tour?
- What’s the price per person?
- Do you get pickup and drop-off from the cruise port?
- What attractions are included and what’s not included?
- Is Salamanca Market part of the tour?
- What if the weather blocks Mt Wellington?
- How many travelers are on the tour?
Key moments that make this tour worth your time
- Cruise-port convenience: You’re collected and returned from the terminal area, so you can spend your energy sightseeing.
- Mt Wellington at 1,272m: A quick summit hit with big views, plus a weather plan if conditions block the lookout.
- Salamanca Market (Saturday only): A timed window to shop local and snack on Tasmanian produce and crafts.
- Richmond’s convict-era charm: The historic township stop is designed to give you context fast, even if lunch is rushed.
- Bonorong Wildlife Sanctuary entry included: You’ll get time with kangaroos and the chance to see Tasmanian devils.
- Air-conditioned transport + live guide chat: The drive is part of the experience, not just a commute.
Port-day reality: why the Hobart highlights route works
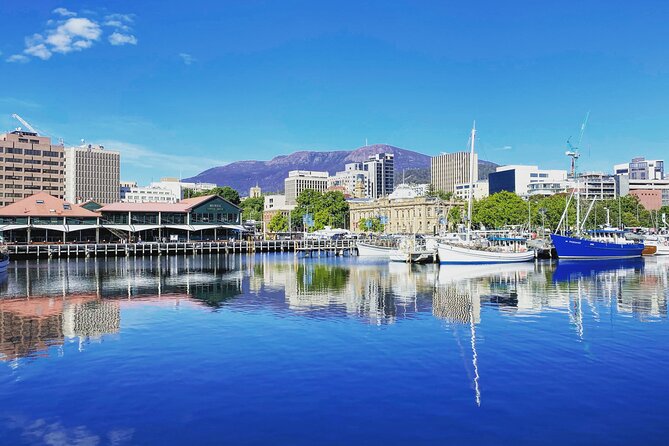
Hobart can fool you. The city looks compact, but the best stuff—especially Mt Wellington and the wildlife—sits a bit outside town. This tour is built for the one-day sailor mindset: see the top sights, get context, and still keep moving so you do not stress about missing the ship.
You’re also not stuck with a huge bus swarm. With a maximum of 20 travelers and a smaller vehicle feel, you’ll typically get easier conversation, clearer instructions, and less time lost to general sorting and waiting. That matters when you’re working with cruise schedules.
Price-wise, you’re paying for a full day of transport plus entry to Bonorong Wildlife Sanctuary, with live commentary during the drive. Lunch is on your own, but the structure means you can choose something quick and local without the tour falling apart.
More walks through Hobart, Salamanca and Battery Point
Mt Wellington (Kunanyi): the summit hit and how to actually enjoy it
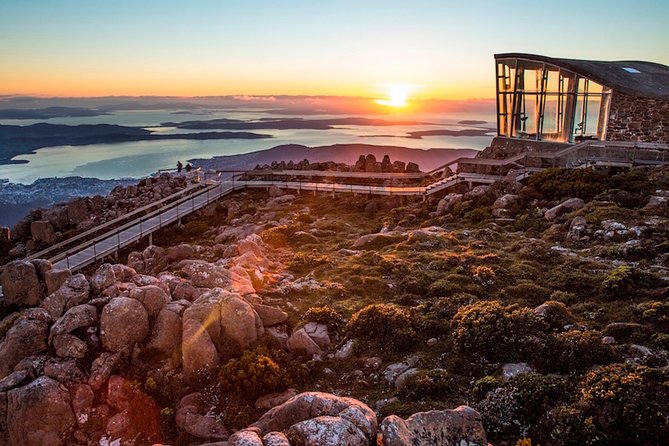
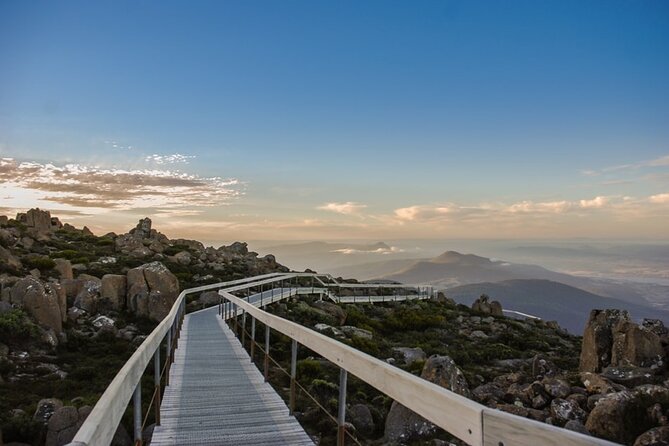
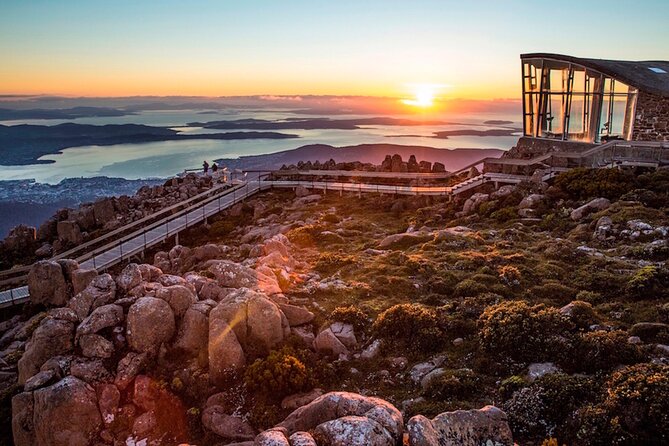
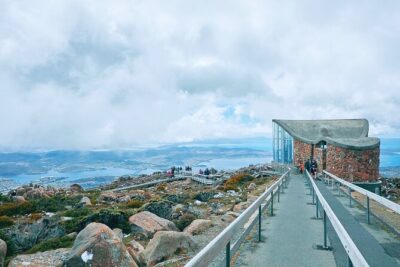
Your day kicks off with Kunanyi, also called Mt Wellington, rising to 1,272 meters. Even with a short stop (about 30 minutes), it’s one of those places that gives you immediate perspective on Tasmania’s geography—mountains, coastline, and the way the weather changes fast.
The best practical advice here is to dress for wind, not just for temperature. If you go up expecting summer weather, you will be miserable. Mt Wellington is frequently colder than Hobart’s streets, and the breeze can turn a quick viewpoint stop into a speedy photo sprint. One of the most consistent tips from guide-led days is simple: bring something warm and windproof.
There’s also a built-in weather contingency. If Mt Wellington is covered by cloud or snow, the plan shifts to Rosny Lookout instead. That means you’re not losing the whole “big view” moment if conditions are rough—just swapping the location.
The Salamanca Market stop: the fun (and the limitation)
Next comes Salamanca Market, available only on Saturdays. If you’re on the right day, this is where Hobart gets its “local life” energy fast: craft browsing, Tasmanian food finds, and small souvenirs that actually feel like they came from Tasmania instead of a generic cruise-shop loop.
The time window is about 1 hour 15 minutes, which is enough to walk, browse, and grab a snack, but not enough to become a full-on shopper who needs time for every stall. I’d use this stop with a plan: decide what you want before you arrive (food? small gifts? postcards?), then spend your time doing that rather than drifting until the clock wins.
If your cruise port day isn’t Saturday, you won’t get Salamanca Market as part of the route. Still, you’ll get the other major stops and the same overall pacing.
Richmond: convict-era streets in about an hour
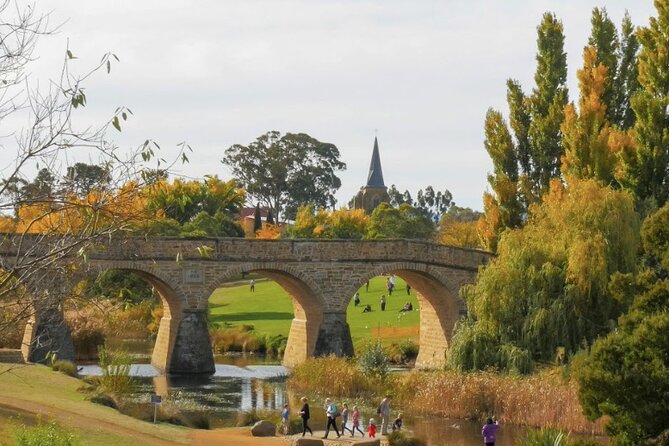
Then you head to Richmond, a historic township known for convict history and classic sandstone and colonial buildings. The charm is the “small place, big story” feeling: it’s the kind of stop where you can look up at old architecture and quickly understand why people keep returning to it.
You’ll have about an hour here. That’s plenty to walk the main areas, see the oldest-bridge highlight, and take in the atmosphere, but it can be tight if you’re hoping for a long lunch. One practical pattern I’d expect: you’ll likely end up doing lunch on the move—snack now, real meal later—because restaurants need time to prepare.
Also, Richmond’s appeal is more about walking and atmosphere than about nonstop shopping. If you like photo breaks, historic streets, and a short step back in time, you’ll do well in the timeframe. If you’re the type who needs lots of stores and frequent activities, you may feel like the stop ends quickly.
Wicked Cheese Co. in the Coal River Valley: quick taste, not a full tour
After Richmond, the route heads into the Coal River Valley wine region. The tour includes a short stop at The Wicked Cheese Co., around 15 minutes.
This part is best treated like a refresh and sampling stop, not a deep wine-and-cheese afternoon. The time is short by design, which keeps the overall schedule workable for Mt Wellington and Bonorong later. If you want to buy a few items to take back (or share later), you’ll likely enjoy this stop. If you’re expecting a longer tour experience, you may find it more like a store visit than a guided production walkthrough.
A few more Hobart trips to weigh before you book:
- Shore Excursion: Hobart Highlights Day Tour
★ 4.5 · 107 reviews - Shore Excursion-Hobart Wanderer
★ 5.0 · 87 reviews - Hobart Shore Excursion: Hobart Attractions Bus
★ 5.0 · 21 reviews - Shore Excursion: Hobart Wanderer
★ 4.6 · 16 reviews - Cruise Ship – Port Arthur Shore Excursion – Hobart
★ 5.0 · 15 reviews
Bonorong Wildlife Sanctuary: the animal time you’ll remember
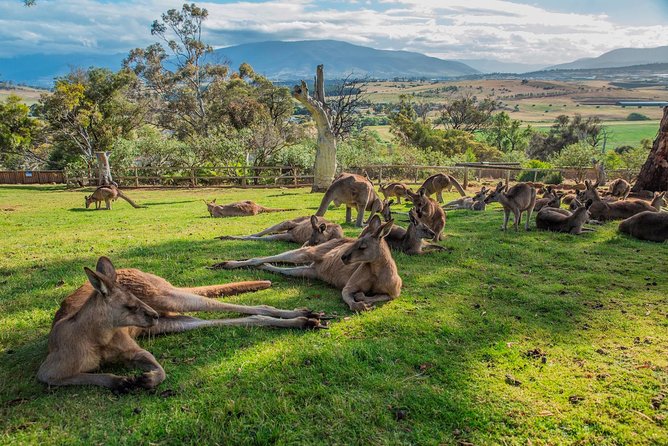
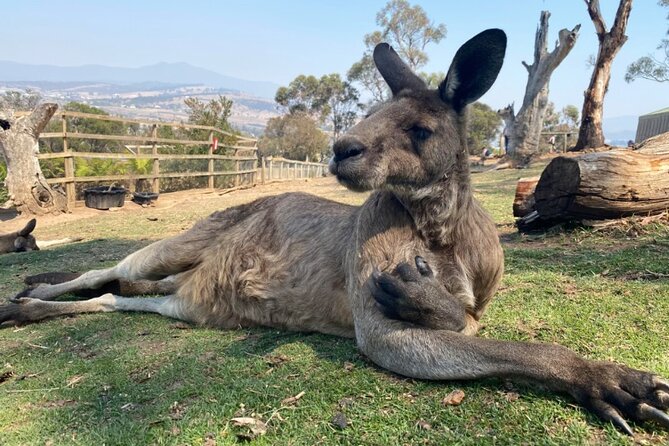
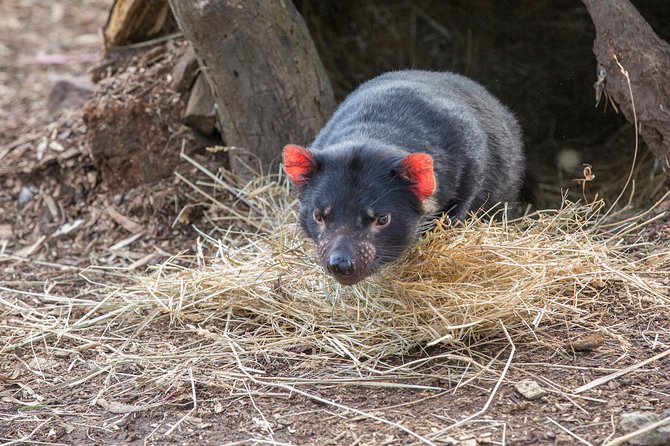
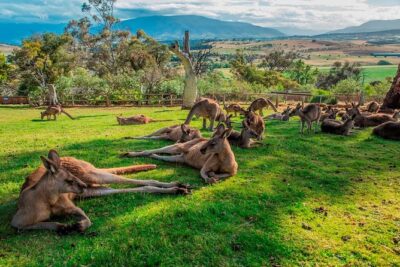
Bonorong Wildlife Sanctuary is the emotional anchor of the day. You get about 1 hour 15 minutes at the sanctuary, and general entry is included in your tour price. This is where the tour delivers on its promise of close encounters: kangaroos are a highlight, and the sanctuary also features Tasmanian devils and other Australian wildlife.
A big reason this stop works for first-time visitors is that it feels personal. Instead of watching animals from far away, you’re in the environment where you can get that hands-on, face-to-face moment—especially with kangaroos. And Tasmanian devils are not the kind of thing you casually see in most places, so the payoff here is real.
If you’re aiming for the best experience, plan to stay present during the sanctuary time. The clock can move faster than you think—people get wrapped up in feeding or watching, and suddenly you realize you’re close to the end of the session. That’s not a flaw; it’s just the nature of a timed shore excursion.
Guides and pacing: why the small-group style matters
The quality of the day tends to hinge on the guide/driver. When this tour is firing on all cylinders, it feels like a moving mini-lecture plus route management—easy to follow, but never boring. You may see named guides like Jodi Alexander, Peter, Andrew, Mark, Steve, Tammie, or Nathan, and the common thread in feedback is that the commentary adds context to what you’re seeing.
For you, the real value is pacing. You’re not left to guess when to look at a viewpoint or how to prioritize within each stop. You also get live guidance about what to watch next and how to handle changing conditions. In cold or windy weather at Mt Wellington, this kind of adjustment is what keeps the day from turning into a miserable waiting game.
Vehicle comfort is usually fine for a day trip, but it is still a small van/coach setup. Seats can be close for taller passengers, so if you’re sensitive about leg room, you might want to sit where you’ll have the most space.
What you actually get for $107.59
This is not a bargain-priced tour. At $107.59 per person, you’re paying for a lot of logistics: cruise-terminal pickup/drop-off, air-conditioned transport, live commentary, and sanctuary entry. The tour is also capped at 20 travelers, which often costs more than running a bigger bus.
So the value depends on what you’d do on your own. If you tried to DIY, you’d still need transport to Mt Wellington, Richmond, and Bonorong—and you’d likely lose time figuring out schedules and driving around. Here, you buy the time-saving and the pre-set route, plus you get Bonorong included.
Lunch and drinks are not included, so budget that separately. The upside is you can choose a lunch style that matches your appetite and pace—quick snack, pub meal, or something lighter—without feeling like the tour forces one option on you.
Weather: the part that can make or break Mt Wellington
Tasmania’s weather can change like it has a personal calendar. This tour runs in most weather conditions, but Mt Wellington is the swing point. If clouds or snow block the summit viewpoint, you’ll swap to Rosny Lookout.
For you, the takeaway is simple: pack for layers. Even if Hobart looks mild, wind at elevation can flip your comfort fast. You’ll enjoy the views much more if you’re not fighting chills while holding your phone at arm’s length.
Also, keep in mind that time at each stop is planned. If weather is rough, guides may adjust the flow to keep you on track. That’s a reason to trust the schedule rather than planning to stretch every stop independently.
Who this Hobart Highlights Day Tour suits best
This is ideal if:
- You’re on a cruise and want a low-stress way to hit several top sights in one go.
- You like a mix of city, history, views, and wildlife without switching plans mid-day.
- You want guided context while driving, especially for Richmond’s convict-era setting and the region around Hobart.
It might be less ideal if:
- You hate cold/wind and would rather do only indoor or gentle-city stops.
- You want long browsing time at markets or a leisurely sit-down lunch in Richmond.
- You’re the type who strongly dislikes time limits at attractions.
Should you book it?
If your main goal is seeing the big Hobart moments efficiently, I’d book this tour. The cruise-port pickup saves you from a lot of stress, and the combination of Mt Wellington, historic Richmond, and Bonorong Wildlife Sanctuary is exactly the mix that makes a short visit feel satisfying.
Before you go, do two things: pack warm layers for the summit area, and decide how you’ll handle lunch so you don’t feel rushed later. If you can accept that it’s a timed, five-stop day (not an all-day wandering spree), you’ll get good value for your time on shore.
If your cruise day lines up with Saturday, Salamanca Market becomes a bonus. If it doesn’t, you still get the core route—and you can treat Hobart’s shopping and food choices as an easy plan before or after the tour.
FAQ
How long is the Hobart Highlights Day Tour?
It runs about 5 to 7 hours, depending on conditions and timing in port.
What’s the price per person?
The tour price is listed as $107.59 per person.
Do you get pickup and drop-off from the cruise port?
Yes. Pickup and drop-off are offered from the Hobart cruise terminal.
What attractions are included and what’s not included?
Bonorong Wildlife Sanctuary general entry is included. Lunch and drinks are not included.
Is Salamanca Market part of the tour?
Salamanca Market is included but only on Saturdays.
What if the weather blocks Mt Wellington?
If poor weather covers Mt Wellington, Rosny Lookout will be used as a substitute.
How many travelers are on the tour?
The tour has a maximum of 20 travelers.
More Tours in Hobart
- Bruny Island Food, Sightseeing, Guided Lighthouse Tour & Lunch
★ 5.0 · 2,989 reviews - Full-Day Guided Bruny Island Tour from Hobart
★ 5.0 · 1,331 reviews - kunanyi/Mt Wellington Explorer Bus- Return Tour (2.5 hours)
★ 5.0 · 1,249 reviews - From Hobart: Full-Day Bruny Island Tour with Guide
★ 4.7 · 755 reviews - Day Tour in Mt. Field, Mt. Wellington, Bonorong Wildlife Sanctuary and Richmond
★ 5.0 · 735 reviews
More Tour Reviews in Hobart
- Bruny Island Food, Sightseeing, Guided Lighthouse Tour & Lunch
★ 5.0 · 2,989 reviews - Full-Day Guided Bruny Island Tour from Hobart
★ 5.0 · 1,331 reviews - kunanyi/Mt Wellington Explorer Bus- Return Tour (2.5 hours)
★ 5.0 · 1,249 reviews - Hobart: kunanyi/Mt Wellington Explorer Bus Pass
★ 4.8 · 848 reviews - Bruny Island Traveller – Gourmet Tasting and Sightseeing Day Trip from Hobart
★ 5.0 · 786 reviews
Walking Tours of Hobart
- Hobart History, People & Places – 2 hour city walk
★ 5.0 · 224 reviews - Hobart: 3-Hour City Sightseeing Tour
★ 4.6 · 179 reviews - Hobart City Sightseeing Tour including MONA Ticket
★ 4.4 · 153 reviews - Old Hobart Pub Walking Tour
★ 4.5 · 91 reviews - Shore Excursion-Hobart Wanderer
★ 5.0 · 87 reviews
Just Added: Fresh Hobart and Tasmania Reviews




Hobart City & Walking Tours, compared.
 ★ 5.0Hobart History, People & Places – 2 hour city walkFrom $27224 reviews
 ★ 4.63-Hour City Sightseeing TourFrom $46179 reviews
 ★ 4.4Hobart City Sightseeing Tour including MONA TicketFrom $99153 reviews
 ★ 4.5Old Hobart Pub Walking TourFrom $2791 reviews
 ★ 5.0Shore Excursion-Hobart WandererFrom $11487 reviews
 ★ 5.0Hobart Highlights Day TourFrom $10084 reviews
 ★ 5.0Salamanca Walk – History TourFrom $2881 reviews
 ★ 5.0Hobart Historic Walking TourFrom $2764 reviews
Browse the lists this tour appears in