

Reviewed · KUNANYI / MOUNT WELLINGTON TOURS
kunanyi/Mt Wellington Tour & Hobart Hop-On Hop-Off Bus
Two buses, one view to plan your day. This combo turns kunanyi/Mt Wellington into a 30-minute summit moment with 360-degree views, then hands you a hop-on hop-off city loop so you can shape the rest of your Hobart day. You get the best of both worlds: alpine scenery and an easy way to hit the waterfront, markets, museums, and breweries without checking timetables every hour.
I also like how this works for real travel brains. The explorer pass is valid all day, the city loop ticket covers you for 48 hours, and the setup is simple enough to use even if you’re short on time or just don’t want decisions. One caution: alpine weather can move fast. Fog, wind, or even official road closures can cut down what you see at the top, so keep your expectations flexible.
In This Review
- Key things that make this package work
- Mt Wellington + Hobart in one ticket: how to use this combo
- Getting to kunanyi/Mt Wellington: what the explorer bus actually delivers
- Summit time: why 30 minutes is both enough and not too long
- Optional hop-offs at Fern Tree Park, The Springs, and The Chalet
- Fern Tree Park stop
- The Springs stop
- The Chalet stop
- The Hobart Hop-On Hop-Off loop: how to plan your day with 20 stops
- Brooke Street Pier
- Salamanca Place
- Wrest Point
- Cascade Brewery
- Female Factory
- Tasmanian Museum and Art Gallery + Maritime Museum
- Hobart Convict Penitentiary
- Botanical Gardens + Aquatic Centre
- Village Cinema
- Where timing gets tricky (and how to handle it)
- What to pack: your comfort kit for windy alpine air
- Value for money: why $60.97 can make sense
- Who should book this, and who should skip it
- Should you book this package?
Key things that make this package work
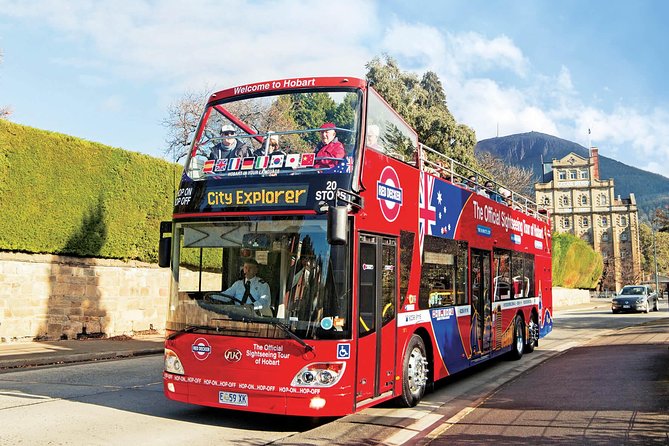
- 30 minutes at the summit of kunanyi/Mt Wellington at 1,270 metres, with timed breathing room for photos and views
- 48-hour Red Decker city loop plus a narrated route, so you can jump off where you want to slow down
- Optional hop-offs at places like Fern Tree Park and The Springs, with access to walking tracks
- Bushwalking map + official guidebook handed to you, which helps you plan without guessing
- Small-group feel (maximum 27 travellers) and a comfy ride with air-conditioning and onboard Wi‑Fi
- Driver-led alpine experience that matters when roads are winding and conditions change quickly
Mt Wellington + Hobart in one ticket: how to use this combo
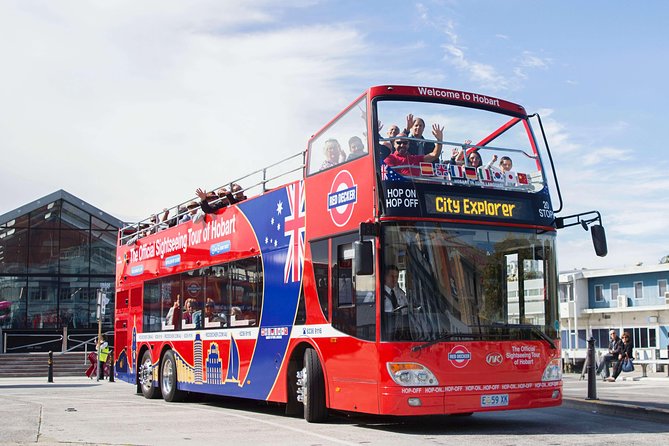
This package is built for the classic Hobart problem: you want the big views up high, but you also want to see the city without burning your whole day in transit. The Kunanyi/Mt Wellington part focuses on getting you to the summit area efficiently, including about 30 minutes up top. Then the Red Decker loop gives you a flexible way to explore Hobart at your pace.
What makes it feel like value is the balance. You’re paying for transport and commentary, but you’re also buying time. The city loop saves you from route planning, and the summit timing keeps you from turning the whole day into one long car trip.
More trips up kunanyi and Mount Wellington
Getting to kunanyi/Mt Wellington: what the explorer bus actually delivers
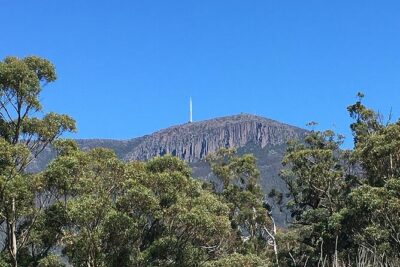
The kunanyi/Mt Wellington Explorer Bus is the practical heart of this tour. It’s designed to take you from Hobart to the summit level (about 1,270 m above the city) and get you back without the stress of navigating steep, winding roads on your own.
A few details matter here:
- The ride is air-conditioned, which helps on hot or changeable days.
- There’s Wi‑Fi onboard, so you can still catch up on messages while you’re riding.
- The pass gives you English commentary, which is useful because the alpine area can feel like “just trees and rock” if you don’t know what you’re looking at.
Also, this is one of those experiences where the driver’s approach can noticeably change your comfort level. In past rides, guides such as Dave have been praised for staying calm in snow-and-ice type conditions, and Tony has been noted for clear explanations and good timing. If your driver has that same style, you’ll likely feel less tense about the alpine drive.
Summit time: why 30 minutes is both enough and not too long

You’re not getting hours up at the summit—and that’s the point. The package gives you about 30 minutes at the top, which is a sweet spot for most people: long enough for a few photo angles and a walk to viewpoints, but short enough that you’re not stuck if conditions turn.
Here’s how to think about it:
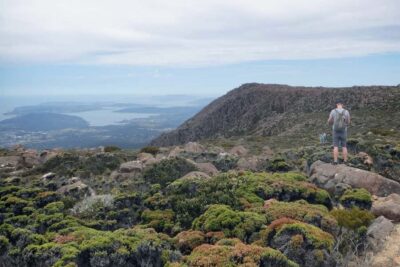
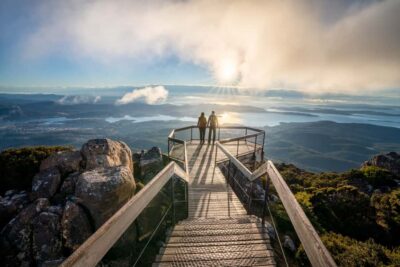
- If the weather is clear, you’ll feel like the island is laid out under you: Hobart and the east coast look one way, and the west looks totally different.
- If it’s foggy or windy, 30 minutes helps you still get something from the experience without freezing your way through a long wait.
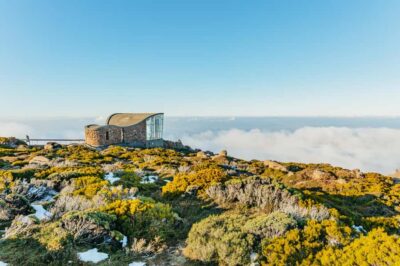
One real consideration is that the summit can be covered in dense fog, or it can feel intensely windy. If fog rolls in, you might get “views above the clouds” instead of views of everything. Either way, bring warm layers and be ready for the alpine version of Hobart weather.
Optional hop-offs at Fern Tree Park, The Springs, and The Chalet
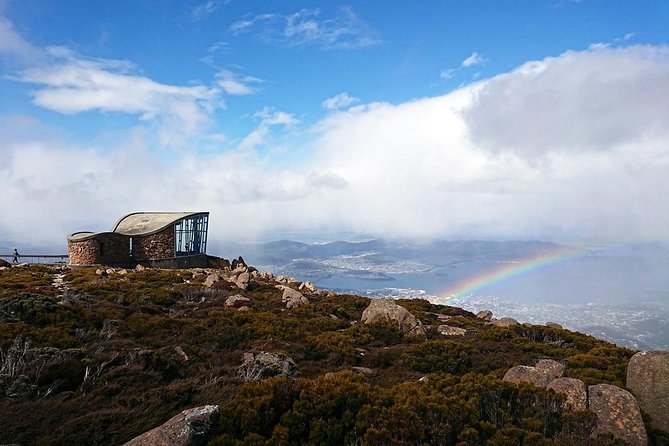
This is where the experience gets more flexible than a simple “drive up and back” outing. You can hop on and off at specific stops, and you’ll have a complimentary bushwalking map to help you decide what to do with your time.
Fern Tree Park stop
This stop is set up for a quick reset: it includes a sheltered grassy area, plus toilets and picnic space. It’s also family-friendly, with children’s play equipment. If you want a short stretch, this is the kind of place where you can regroup before continuing with the day’s plan.
More ways around Hobart on the sightseeing bus
- Hobart: 24-Hour Hop-on Hop-off Sightseeing Bus Ticket
★ 4.5 · 770 reviews - Hobart Hop-on Hop-off Bus Tour
★ 4.5 · 565 reviews - Hobart: Kunanyi/Mt Wellington Hop-on Hop-off Bus Pass
★ 4.8 · 343 reviews - kunanyi/Mt Wellington Tour & Hobart Hop-On Hop-Off Bus
★ 5.0 · 275 reviews - 48 Hour Hobart City Hop-On Hop-Off Tour
★ 4.2 · 49 reviews
The Springs stop
The Springs is a different vibe: it’s described as a level picnic area with toilets plus picnic tables and gas-fired barbeques. It also acts as a starting point for multiple walking tracks and mountain bike trails, so it can work well if you’re the type who enjoys choosing from options mid-day.
The Chalet stop
If you’re aiming higher and you want a bigger hike option, The Chalet is part of that story. One highlighted route is the Organ Pipes Walk, listed as a 3-hour return walk. It’s noted as difficult and follows the contour of the mountain area, so it’s not for a quick stroll mindset.
Practical tip: these hop-offs are great, but don’t let them tempt you into overbooking your day. The summit time is timed into the tour structure; if you go heavy on walking early, you’ll want to make sure you still feel good when it’s time to head up.
The Hobart Hop-On Hop-Off loop: how to plan your day with 20 stops
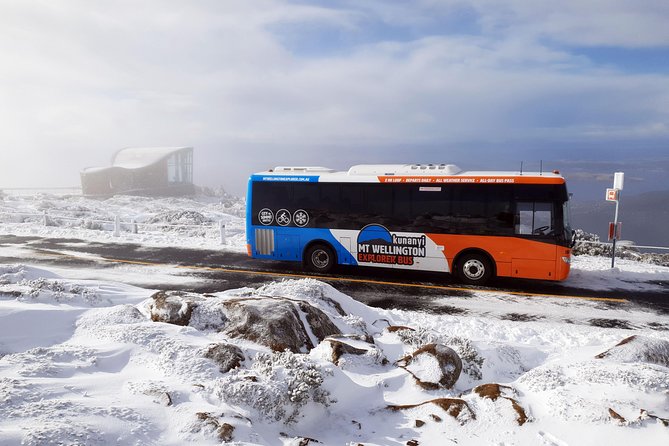
After kunanyi/Mt Wellington, the Red Decker city loop is where you cash in the “flexible travel” part of the ticket. It includes a 90-minute narrated route with 20 convenient stops, and your ticket is valid for 48 hours, which means you can repeat a circuit or adjust based on energy and weather.
The meeting point for the loop is set at Brooke Street Pier (12 Franklin Wharf) on Hobart’s waterfront. From there, you can use the bus as your moving base and decide where you want to spend time.
Brooke Street Pier
This is the departure point and also a handy orientation spot. It’s described as a floating structure that rises and falls with the tide, and it’s also linked with boats—so it’s a great place to start your city orientation.
Salamanca Place
If you like markets, this stop is a big one: Salamanca Place is where Salamanca Market runs every Saturday (rain, hail, or shine). Even if your timing doesn’t match market day, the area is still a key “Hobart feels like Hobart” location.
Wrest Point
This stop leans toward waterfront leisure. You’ll find restaurants, bars, live music, and casino entertainment. If you want a later-afternoon plan, this is a reasonable place to pop off.
Cascade Brewery
This one’s for food-and-drink planning. Cascade is where you can sample beverages by the glass, as a tasting paddle, and it’s tied to lunch options at Cascade Brewhouse. Even if you don’t go in for a full stop, it’s a nice “refresh point” in your hop-off strategy.
Female Factory
This is a history stop with serious weight: you can visit Cascades Female Factory for convict women and their children. If you’re interested in Tasmania’s past, this is one of the more meaningful places on the loop list.
Tasmanian Museum and Art Gallery + Maritime Museum
These two stops cover two different flavors of local storytelling. The Tasmanian Museum and Art Gallery focuses on unique Tasmanian history, while the Maritime Museum of Tasmania is centered on maritime stories and includes current public talks you can check once you’re there.
Hobart Convict Penitentiary
Another convict precinct stop, built in the 1830s. If you’ve done one convict site already, this is your chance to see more of how the system worked and why the area matters.
Botanical Gardens + Aquatic Centre
The Royal Tasmanian Botanical Gardens are described as Australia’s premier cool-climate garden, spread across 14 hectares. If you want a calmer break after the morning drive, this is a good choice. The Aquatic Centre is for downtime with facilities like an Olympic-size pool, leisure pools, water slide, spa, sauna, steam room, and gym.
Village Cinema
If you need a weather-proof plan (or you just want a break with air-conditioning), this stop gives you that option.
Where timing gets tricky (and how to handle it)

This package runs about 4 hours to as long as 2 days depending on how you use the hop-off parts and how much walking you add. That flexibility is good, but it means your schedule is partly on you.
The two biggest timing factors are:
1) How long you actually stay up at kunanyi/Mt Wellington when conditions are clear
2) How you pace the city loop when you get tempted by stops like Salamanca Place, Cascade, and the museums
A real-world warning from the alpine side: sometimes conditions force action. Fire restrictions and high winds can lead to reduced access, and authorities can close the mountain. If the summit road is closed on your day, you might still get value from the city loop even if the alpine part is limited.
What to pack: your comfort kit for windy alpine air
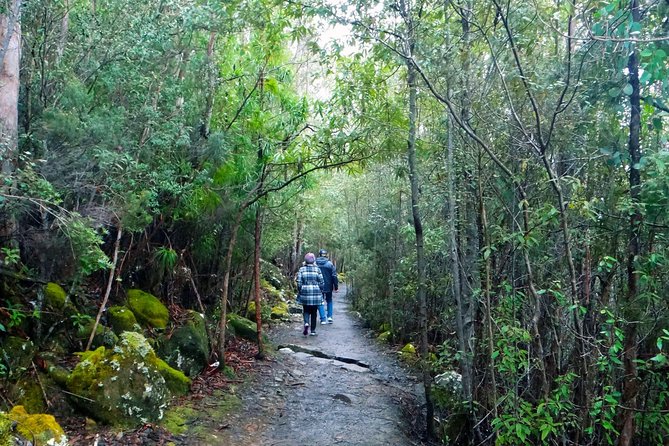
The tour itself is clear that you’ll be dealing with an alpine environment. That means you should treat the summit like a separate climate, not like a “quick stop on the way.”
Here’s what I’d pack without overthinking:
- Warm layers (the sort you can add in minutes)
- Wind protection (wind on top can hit hard)
- Gloves or something similar for colder hands
- Comfortable shoes if you plan to use any walking tracks from hop-offs
A couple of the best practical hints from guide-style feedback are about being ready for cold. People have repeatedly pointed out that dressing very warmly makes the summit experience far more enjoyable.
Also, if you’re sensitive to winding roads, consider it. The drive is described as a winding route, and car-sickness is a common travel issue in mountain areas like this.
Value for money: why $60.97 can make sense
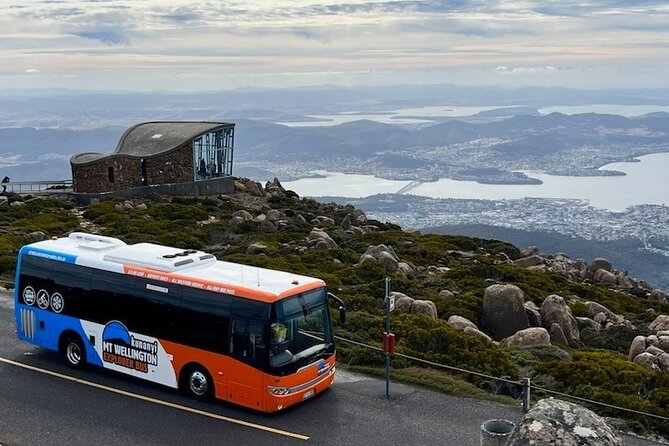
At about $60.97 per person, this package is not just a “bus ticket.” You’re bundling:
- A kunanyi/Mt Wellington Explorer Pass valid all day (with English commentary)
- A Red Decker 48-hour hop-on hop-off city loop ticket
- A complimentary official guidebook to help you plan
- A complimentary bushwalking map for the alpine area
- An air-conditioned vehicle and onboard Wi‑Fi
The summit admission is also effectively built in for the main summit timing (you get that 30 minutes at the top). So the cost is really paying for transport + planning support + guided storytelling, not just one ride up.
For me, it’s strongest value if you:
- Only have one full day in Hobart
- Want to see the big “must-do” without a rental car
- Prefer to control your time once you’re there
Who should book this, and who should skip it
This is a great fit if you like structure with freedom. You’ll get a guided alpine highlight, then a city loop that lets you choose what deserves your time.
It’s also a smart choice if:
- You don’t want to manage parking or driving in a smaller-city setup
- You want an easy, low-stress way to cover many Hobart sights
- You’d enjoy picking one or two stops for a deeper visit (Salamanca Place, museums, Cascade, a garden break)
I’d be more cautious if:
- You hate uncertainty from weather. Fog and wind can happen at the summit.
- You’re planning a very tight day where a delayed alpine segment would wreck your timing.
- You’re hoping to “guarantee” summit views every time. This is an alpine environment; conditions can change.
Should you book this package?
If your goal is simple—get the famous views up at kunanyi/Mt Wellington and still see key Hobart sights without drama—then yes, it’s a solid booking. The pricing works because it bundles two touring styles: one that gets you up high, and one that lets you explore the city at your own speed.
I’d book it if you can stay flexible on weather and dress warm. If you’re the type who needs the summit to be crystal clear with no surprises, then keep an extra plan for Hobart ready, since fog, wind, or closures can happen.
More Tour Reviews in Hobart
- Bruny Island Food, Sightseeing, Guided Lighthouse Tour & Lunch
★ 5.0 · 2,989 reviews - Full-Day Guided Bruny Island Tour from Hobart
★ 5.0 · 1,331 reviews - kunanyi/Mt Wellington Explorer Bus- Return Tour (2.5 hours)
★ 5.0 · 1,249 reviews - Hobart: kunanyi/Mt Wellington Explorer Bus Pass
★ 4.8 · 848 reviews - Bruny Island Traveller – Gourmet Tasting and Sightseeing Day Trip from Hobart
★ 5.0 · 786 reviews
Around Hobart by Sightseeing Bus
- Hobart: 24-Hour Hop-on Hop-off Sightseeing Bus Ticket
★ 4.5 · 770 reviews - Hobart Hop-on Hop-off Bus Tour
★ 4.5 · 565 reviews - Hobart: Kunanyi/Mt Wellington Hop-on Hop-off Bus Pass
★ 4.8 · 343 reviews - Hobart: Mount Wellington and Hobart Sightseeing Combo Ticket
★ 4.6 · 296 reviews - 48 Hour Hobart City Hop-On Hop-Off Tour
★ 4.2 · 49 reviews
Up kunanyi and Mount Wellington
- kunanyi/Mt Wellington Explorer Bus- Return Tour (2.5 hours)
★ 5.0 · 1,249 reviews - Hobart: kunanyi/Mt Wellington Explorer Bus Pass
★ 4.8 · 848 reviews - Day Tour in Mt. Field, Mt. Wellington, Bonorong Wildlife Sanctuary and Richmond
★ 5.0 · 735 reviews - Hobart: Mt Wellington, Mt Field, Bonorong and Richmond Trip
★ 4.8 · 722 reviews - Hobart: Kunanyi/Mt Wellington Hop-on Hop-off Bus Pass
★ 4.8 · 343 reviews
Just Added: Fresh Hobart and Tasmania Reviews





kunanyi / Mount Wellington Tours, compared.
 ★ 5.0kunanyi/Mt Wellington Explorer Bus- Return Tour (2.5 hours)From $351,249 reviews
 ★ 4.8kunanyi/Mt Wellington Explorer Bus PassFrom $35848 reviews
 ★ 5.0Day Tour in Mt. Field, Mt. Wellington, Bonorong Wildlife Sanctuary and RichmondFrom $128735 reviews
 ★ 4.8Mt Wellington, Mt Field, Bonorong and Richmond TripFrom $126722 reviews
 ★ 4.8Kunanyi/Mt Wellington Hop-on Hop-off Bus PassFrom $35343 reviews
 ★ 4.6Mount Wellington and Hobart Sightseeing Combo TicketFrom $60296 reviews
 ★ 5.0Easy Bike Tour – Mt Wellington Summit Descent & Rainforest RideFrom $121276 reviews
 ★ 4.8Mt. Field, Mt. Wellington and Wildlife Day TourFrom $130261 reviews
Browse the lists this tour appears in