
Reviewed · KUNANYI / MOUNT WELLINGTON TOURS
Hobart Hop-On Hop-Off Bus & kunanyi/Mt Wellington Tour
Hobart is best when you move at your pace. This Hop-On Hop-Off setup pairs a 48-hour city loop ticket with an all-day pass up to kunanyi/Mt Wellington, so you can do the highlights without renting a car. The buses include onboard narration (in English), plus useful extras like an official sightseeing guide and a bushwalking map.
I like the flexibility most: the 48-hour unlimited rides let you repeat stops for photos or swap plans when weather changes. I also appreciate the practical comfort touches—air-conditioned vehicles and onboard WiFi—which makes waiting for the next bus much easier.
One thing to consider: bus stops and timing can be a little unforgiving. If you’re slow finding your stop or you miss the connection, you can end up waiting longer than you want, and the last return service can run early.
In This Review
- Key things to know before you ride
- The ticket deal: 48 hours in Hobart plus an all-day Mt Wellington pass
- City loop in a 90-minute circle: how to use it without rushing
- kunanyi/Mt Wellington Explorer Pass: the main reason this ticket is worth it
- Your hop up kunanyi: from Brooke Street Pier to The Pinnacle
- City loop stops: what to do at each place without overthinking
- Touring strategy: photos, weather, and finding your stops fast
- Treat the first day like scouting
- Plan for weather, especially at the top
- Don’t waste time hunting bus stops
- Make a call on motion sickness early
- Keep an eye on the end of the day
- Who this tour suits (and who may want to think twice)
- FAQ
- How long is the Hobart Hop-On Hop-Off and Mt Wellington tour?
- What do I get with the 48-hour ticket?
- What does the kunanyi/Mt Wellington Explorer Pass include?
- What free materials are included?
- Is WiFi and air-conditioning included?
- Is food or entry to attractions included?
- Is there free cancellation?
- Should you book this Hobart Hop-On Hop-Off plus kunanyi/Mt Wellington tour?
Key things to know before you ride
- 48-hour unlimited city loop access means you can split sights across two days instead of cramming
- All-day kunanyi/Mt Wellington Explorer Pass gives you time for lookout stops and short walks
- Onboard commentary in English helps you understand what you’re seeing as you go
- Red Decker’s official Hobart guide + Wellington Park bushwalking map reduce guesswork once you’re off the bus
- Air-conditioning and WiFi make long waits and cool/windy days less annoying
- Plan around the last bus so you don’t get stuck calling a rideshare at the end of the day
The ticket deal: 48 hours in Hobart plus an all-day Mt Wellington pass
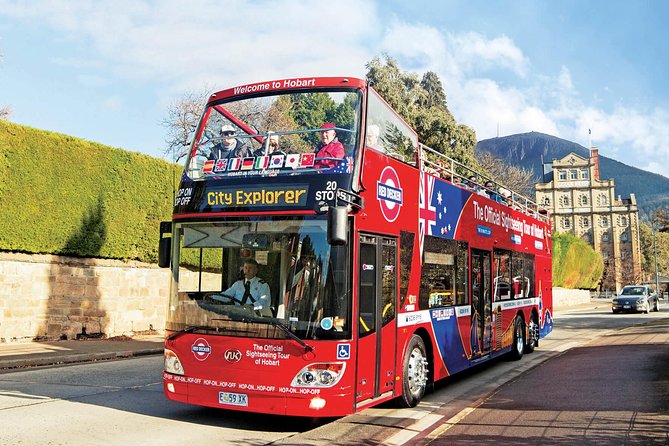
This ticket is built for “see a lot, stress less.” For about $60.97 per person, you’re not just buying one bus ride—you’re getting two connected experiences:
- A 48-hour Hop-On Hop-Off City Loop (unlimited rides)
- A separate kunanyi/Mt Wellington Explorer Pass that’s valid all day and includes English commentary
That’s the real value here. If you only had one 90-minute tour, you’d spend your day getting on and off at just the right times. Instead, the 48-hour access lets you return to places you missed, linger where you like, and move on when the weather turns.
A couple reminders about cost/value: food and drinks aren’t included, and entrance fees aren’t included either. So think of this as your transport + orientation package. You’ll still want to budget for meals and any sites that charge entry.
More trips up kunanyi and Mount Wellington
City loop in a 90-minute circle: how to use it without rushing
The city loop is designed as an easy orientation tool. It starts and finishes at the Tasmanian Travel & Information Centre, and the whole loop takes about 90 minutes. That’s a good length: long enough to cover real sights, short enough that you can re-hop later without losing your whole day.
Because you have 48 hours of unlimited access, you can treat it like a buffet. First pass is for orientation. Second pass is for photos, errands, or the one stop you want to revisit.
You’ll also notice the route mixes “iconic Hobart” with practical hubs. You’re not just bouncing between scenic viewpoints; you’re passing through areas that make it easy to connect with other plans, like museums, gardens, and central streets.
kunanyi/Mt Wellington Explorer Pass: the main reason this ticket is worth it
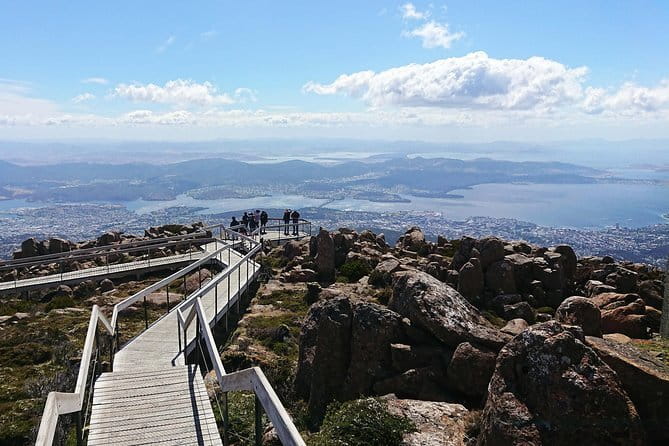
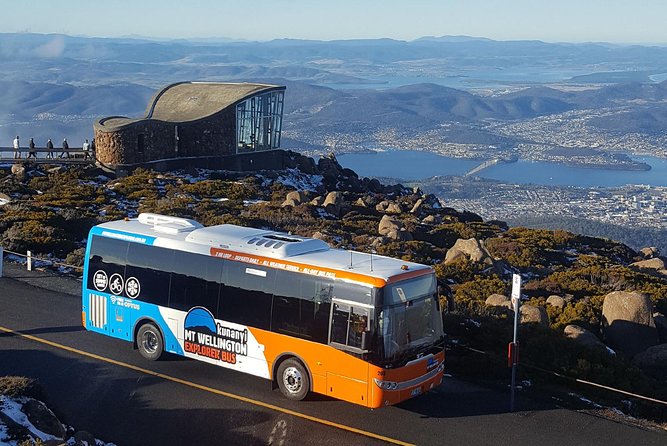
If Hobart’s city loop helps you learn the map, kunanyi/Mt Wellington is where you get the big-picture payoff. This separate bus service takes you up into Wellington Park, with multiple planned stops along the way, including a stop at Wellington Park (The Chalet) and further lookout points on Pinnacle Road.
The timing advantage is huge: the Explorer Pass is valid all day, which means you’re not stuck with a short, rushed departure. On clear days, this is where the views can really impress. On colder or windy days, you’re also less likely to feel trapped—because you can plan your return when you’re ready.
Two practical notes based on real-world experience:
- The top can be very windy and cold. One common setup is you arrive ready for chilly air (even around freezing temperatures).
- If you’re sensitive to motion, the ascent involves narrow roads, so where you sit can matter.
Your hop up kunanyi: from Brooke Street Pier to The Pinnacle

This side of the experience starts with pick-up at Brooke Street Pier (you should be ready about 10 minutes before departure). From there, the bus heads toward Wellington Park with stops that work well for different styles of exploring—quick viewpoint visits, or brief walks when the air is clear.
Here’s how each stop functions in real terms:
Hydro Tasmania Building
This is an early landmark on the way out. It’s useful as a “we’re properly on route” checkpoint, and it gives you a natural moment to settle in before the drive becomes more mountainous.
Fern Tree Park (Unit 1/678 Huon Rd)
Fern Tree Park is a helpful mid-stage stop. It’s a good time to stretch a bit, re-check what you want to do at the upper stops, and take a breath if the ride has you a little tense.
North-South Track (The Springs bus stop)
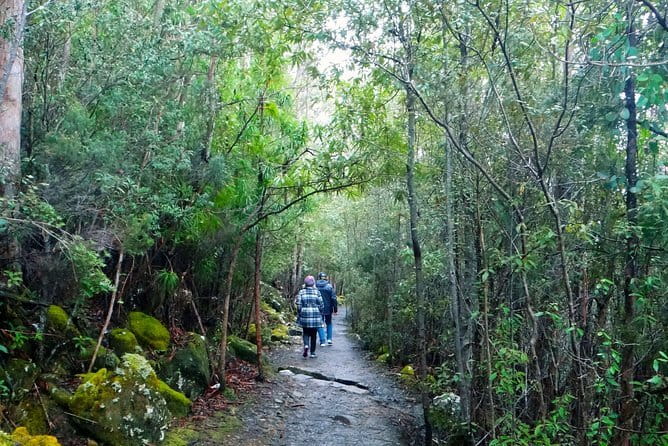
This is one of the “trail-adjacent” type stops. If you’re planning to walk, this is the kind of location where a bushwalking map becomes more than a souvenir—it helps you decide whether your feet should stay in “quick legs” mode or “slower exploration” mode.
Wellington Park (The Chalet)
This is your core access stop. If you want the classic lookout experience, the Chalet area is the place you aim for. It’s also where you can adjust your plan based on what the weather is doing—clear skies mean you can linger longer, cloudy/rainy conditions mean you’ll want to be more efficient with your time.
Big Bend (Pinnacle Road bus stop)
Big Bend is a great choice when you want that “stop, look, and shoot a few photos” rhythm. It gives you another angle without forcing you to stay only at the highest point.
The Pinnacle (Pinnacle Road bus stop)
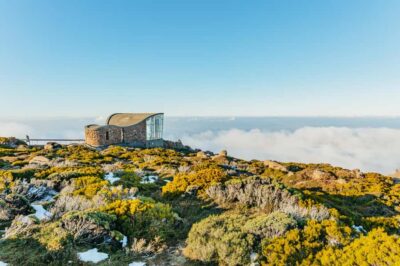
This is the top-ish payoff zone. When the day is clear, this is where you’ll feel like the trip was worth the time. If the wind is fierce, you’ll still get your viewpoint—just expect the experience to be more “quick and focused” than “sit and relax.”
One small practical wish that comes up often: some people want an on-site cafe at the summit. Even if you don’t need it, it’s a reminder to pack what you’ll want for comfort (layers, and maybe a small snack if you’ll be up there for a while).
City loop stops: what to do at each place without overthinking

Now for the part that helps you build your day: the Hop-On Hop-Off City Loop stops around central Hobart and key sights. You can ride the loop once, then return to your favorite stops within your 48-hour window.
I’ll go stop by stop and translate each into what it’s best for:
Tasmanian Travel & Information Centre (start/finish)
Use it as your planning hub. If you want to reset and re-orient, it’s the easiest place to do it because the loop starts and ends here.
Brooke Street Pier
This is your waterfront anchor. If you’re starting the city loop fresh, this is a great place to begin because you get views and atmosphere right away, and it’s easy to build the rest of your route from here.
Princes Wharf area (30 Morrison St)
This stop points you toward the port-side district. It’s useful if you want a walk by the water, poke around the wharf area, or just keep your sightseeing close to where buses move.
CSIRO (3 Castray Esplanade)
This is a “get off and wander” stop, especially if you like science/education precincts. Even if you don’t go inside anywhere, the area can work well for a short break.
Hampden Rd corner (34 Hampden Rd)
This is a residential/commercial connector stop. It’s helpful if you’re staying in that side of town and want a low-effort way to get back toward central sights.
Cromwell St area (22 De Witt St)
Another access point that helps you reach central Hobart without paying for rideshares for short hops.
Sandy Bay direction (64 St Georges Terrace, near Sandy Bay Rd)
This stop is handy if you’re basing your day in the Sandy Bay side and want the city loop to serve as your main transport spine.
Wrest Point (main entrance)
This is a recognizable landmark stop. Even if you don’t have plans there, it’s a useful “I know where I am” point.
Corner of Sandy Bay Rd and Queen St (143 Sandy Bay Rd)
A convenient stop for walking access to nearby streets and local spots. It’s not a single-sight stop, which makes it good when you want flexibility.
Cascade Brewery Bar (Cascade Brewery area)
This one is easy: it’s your move-for-a-break stop. If you want a casual stop with an obvious destination label, this is it.
Cascade Rd (123 Cascade Rd, corner of Cascade Rd and McRobies Rd)
This is another stop that ties into the Cascade area. If you want a slightly different walk loop from the brewery precinct, you can use this as your adjustment point.
Macquarie St (409 Macquarie St, corner of Macquarie St and Weld St)
This stop puts you near central streets. It’s useful when your day includes shopping, strolling, or simple sightseeing walks.
Village Cinemas Hobart
A practical stop if you want to time sightseeing around a meal or an evening activity. It’s also handy if you’d rather rest than keep hopping when the weather turns.
Collins St (119 Collins St, near Murray St intersection)
A central “walkable Hobart” stop. Collins St is where you can switch from bus mode to walking mode quickly.
Maritime Museum Tasmania
This is one of the key destination stops on the loop. If maritime history interests you, this is the stop to build your day around. Even if you don’t do the full museum plan, it’s a great location for a short, focused visit.
Brisbane St / Campbell St corner (101 Campbell St)
Another central hub stop that makes it easier to reach multiple nearby areas on foot.
University Rose Gardens (corner of Brooker Hwy and Liverpool Street, opposite ABC building)
This is your “get out and breathe” stop. If you want something calmer than street walking, a garden stop like this helps break up the day.
Royal Tasmanian Botanical Gardens
This is the classic Hobart greenery stop. If you’ve only got time for one garden moment, prioritize this one.
Zero Davey Boutique Apartments (corner of Davey St and Hunter St)
This stop is a nice option if you’re staying nearby and want to hop on quickly. It’s also a reminder that the loop connects residential zones with the main sights.
More ways around Hobart on the sightseeing bus
- Hobart: 24-Hour Hop-on Hop-off Sightseeing Bus Ticket
★ 4.5 · 770 reviews - Hobart Hop-on Hop-off Bus Tour
★ 4.5 · 565 reviews - Hobart: Kunanyi/Mt Wellington Hop-on Hop-off Bus Pass
★ 4.8 · 343 reviews - kunanyi/Mt Wellington Tour & Hobart Hop-On Hop-Off Bus
★ 5.0 · 275 reviews - 48 Hour Hobart City Hop-On Hop-Off Tour
★ 4.2 · 49 reviews
Touring strategy: photos, weather, and finding your stops fast
Here’s how to make this tour feel smooth instead of chaotic.
Treat the first day like scouting
Use your first loop for orientation. Jump on, get off where it looks promising, and don’t sweat it if the weather changes while you’re out. Your 48-hour access means you can come back.
Plan for weather, especially at the top
On a clear day, kunanyi/Mt Wellington can deliver views that make you stop talking and just stare. When it’s rainy or cloudy, it may not feel worth the time you spent driving up—so if the forecast is messy, consider making the upper visit a shorter priority window rather than a full commitment.
Don’t waste time hunting bus stops
Some stops can be tricky to spot, and missing a bus can stretch your day because you’ll be waiting for the next one. Your best move is simple: give yourself a buffer, and stand somewhere you can spot the bus when it approaches.
Make a call on motion sickness early
If narrow roads and curvy driving bother you, sit toward the front of the bus. It’s a small change that can make the ride feel much more manageable.
Keep an eye on the end of the day
The last bus timing matters more than you think. If you’re aiming to return late—or you have a strict deadline like a ship departure—you should check the final departure time and build in a safety margin. Missing the last hop can mean calling a rideshare in the evening rush.
Who this tour suits (and who may want to think twice)

This is a great match if:
- You’re visiting Hobart for the first time and want an easy way to learn where everything is
- You want flexibility and don’t want to lock yourself into one short guided route
- You plan to mix bus rides with short walks at places like botanical gardens and Wellington Park
It may not be ideal if:
- You’re highly sensitive to motion and the narrow roads are a major issue (you can still try by sitting front, but it’s something to plan around)
- You hate being constrained by bus stop timing and end-of-day departures
- Weather is likely to be consistently miserable during your Mt Wellington window (you might end up paying for a ride with limited views)
FAQ
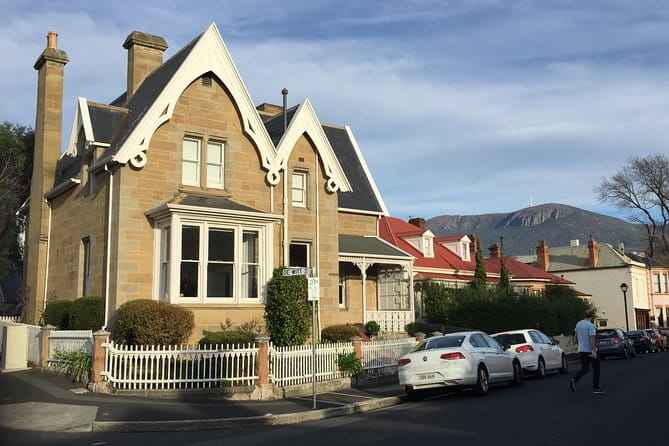
How long is the Hobart Hop-On Hop-Off and Mt Wellington tour?
The experience duration is listed as about 2 hours 15 minutes (approx.).
What do I get with the 48-hour ticket?
You get 48 hours of unlimited access to the Red Decker Hop-On Hop-Off City Loop, with onboard commentary in your language.
What does the kunanyi/Mt Wellington Explorer Pass include?
It includes an all-day pass for the kunanyi/Mt Wellington bus, with English commentary.
What free materials are included?
You receive a complimentary copy of Red Decker’s The Official Sightseeing Guide to Hobart, and a complimentary Wellington Park bushwalking map.
Is WiFi and air-conditioning included?
Yes—there is WiFi on board and the vehicle is air-conditioned.
Is food or entry to attractions included?
No. Food and drinks and entrance fees are not included.
Is there free cancellation?
Yes, you can cancel for a full refund up to 24 hours in advance.
Should you book this Hobart Hop-On Hop-Off plus kunanyi/Mt Wellington tour?
If you want the simplest way to cover Hobart’s top sights and still get up to kunanyi/Mt Wellington without planning every step, I think this is a strong booking. The value comes from the 48-hour freedom plus the all-day upper pass, which turns this into a flexible itinerary rather than a single fixed tour.
Book it especially if you’re car-free, you’re staying for a couple days, or you like having a plan you can adjust when the sky changes. Just do two things before you roll: check the last bus departure time, and plan your stop-finding so you don’t waste time waiting.
More Tour Reviews in Hobart
- Bruny Island Food, Sightseeing, Guided Lighthouse Tour & Lunch
★ 5.0 · 2,989 reviews - Full-Day Guided Bruny Island Tour from Hobart
★ 5.0 · 1,331 reviews - kunanyi/Mt Wellington Explorer Bus- Return Tour (2.5 hours)
★ 5.0 · 1,249 reviews - Hobart: kunanyi/Mt Wellington Explorer Bus Pass
★ 4.8 · 848 reviews - Bruny Island Traveller – Gourmet Tasting and Sightseeing Day Trip from Hobart
★ 5.0 · 786 reviews
Around Hobart by Sightseeing Bus
- Hobart: 24-Hour Hop-on Hop-off Sightseeing Bus Ticket
★ 4.5 · 770 reviews - Hobart Hop-on Hop-off Bus Tour
★ 4.5 · 565 reviews - Hobart: Kunanyi/Mt Wellington Hop-on Hop-off Bus Pass
★ 4.8 · 343 reviews - Hobart: Mount Wellington and Hobart Sightseeing Combo Ticket
★ 4.6 · 296 reviews - kunanyi/Mt Wellington Tour & Hobart Hop-On Hop-Off Bus
★ 5.0 · 275 reviews
Up kunanyi and Mount Wellington
- kunanyi/Mt Wellington Explorer Bus- Return Tour (2.5 hours)
★ 5.0 · 1,249 reviews - Hobart: kunanyi/Mt Wellington Explorer Bus Pass
★ 4.8 · 848 reviews - Day Tour in Mt. Field, Mt. Wellington, Bonorong Wildlife Sanctuary and Richmond
★ 5.0 · 735 reviews - Hobart: Mt Wellington, Mt Field, Bonorong and Richmond Trip
★ 4.8 · 722 reviews - Hobart: Kunanyi/Mt Wellington Hop-on Hop-off Bus Pass
★ 4.8 · 343 reviews
Just Added: Fresh Hobart and Tasmania Reviews





kunanyi / Mount Wellington Tours, compared.
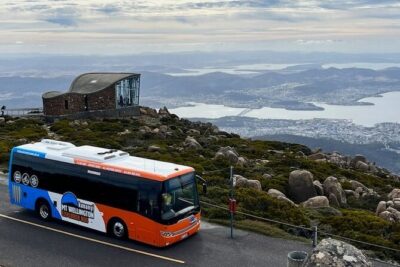 ★ 5.0kunanyi/Mt Wellington Explorer Bus- Return Tour (2.5 hours)From $351,249 reviews
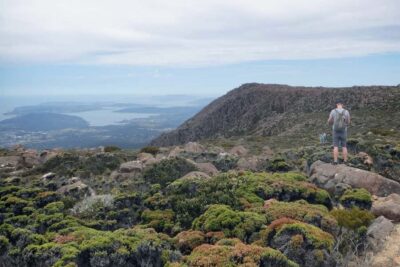 ★ 4.8kunanyi/Mt Wellington Explorer Bus PassFrom $35848 reviews
 ★ 5.0Day Tour in Mt. Field, Mt. Wellington, Bonorong Wildlife Sanctuary and RichmondFrom $128735 reviews
 ★ 4.8Mt Wellington, Mt Field, Bonorong and Richmond TripFrom $126722 reviews
 ★ 4.8Kunanyi/Mt Wellington Hop-on Hop-off Bus PassFrom $35343 reviews
 ★ 4.6Mount Wellington and Hobart Sightseeing Combo TicketFrom $60296 reviews
 ★ 5.0Easy Bike Tour – Mt Wellington Summit Descent & Rainforest RideFrom $121276 reviews
 ★ 5.0kunanyi/Mt Wellington Tour & Hobart Hop-On Hop-Off BusFrom $60275 reviews
Browse the lists this tour appears in