
Reviewed · PORT ARTHUR & THE TASMAN PENINSULA
Tasman Peninsula Small-Group Guided Tour From Hobart
The coast looks sculpted by time. This small-group Tasman Peninsula tour makes it easy to focus on nature, hitting big viewpoint stops like the Tessellated Pavement and sea-cut formations such as Devil’s Kitchen and Remarkable Cave. I especially like the hotel pickup and drop-off, and the chance to see rare geological features without planning or navigating on your own. One thing to keep in mind: lunch isn’t included, and Remarkable Cave involves steps and can feel a bit wet if conditions are damp.
I also like the day is built around short, clear chunks of sightseeing—then breaks for tea/coffee, lavender, and chocolate. The group is capped at 11 people, so you actually have time to ask questions and get your photos sorted (the tour includes photography services). The only real “watch-out” is weather: it requires good conditions, and the cave walk can be slippery if rain hangs around.
In This Review
- Key highlights to look for
- From Hobart to the Tasman Peninsula: what makes this day work
- Pickup and timing: the small-group comfort factor
- Stop-by-stop: what you’ll see and what to expect at each one
- Princes Wharf No. 1: start strong and easy
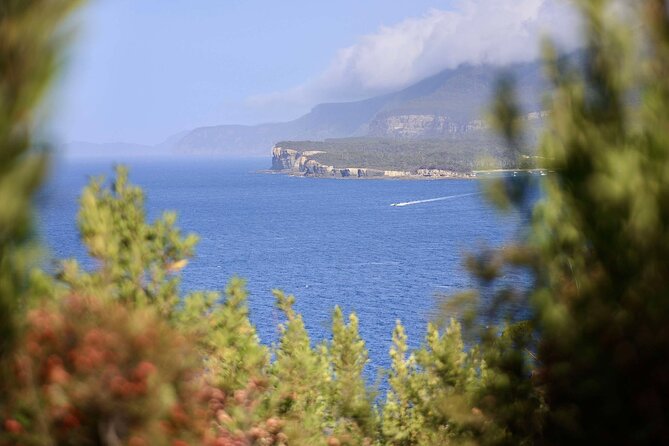
- Tasman Bay National Park Lookout: quick break, real ocean views
- Tessellated Pavement: the rare rock “tiles” moment
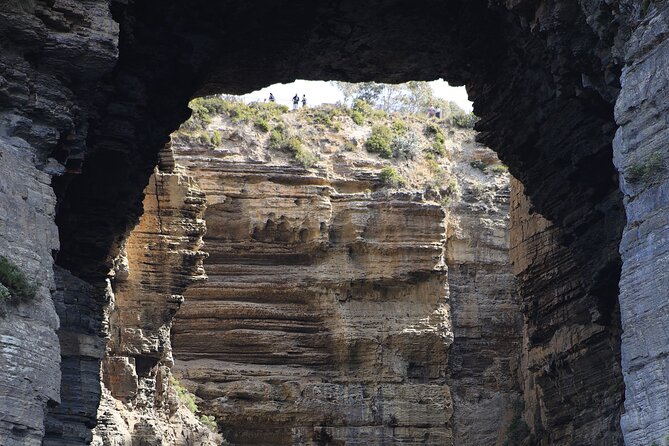
- Tasmans Arch and Devil’s Kitchen: quick, dramatic sea-carving
- Remarkable Cave: the wet-steps moment that many people remember
- Port Arthur Lavender and Tasmanian Chocolate Foundry: breaks that actually fit the day
- Port Arthur Lavender: lunch or coffee plus shop time
- Tasmanian Chocolate Foundry: a sweet final chapter
- Price and value: is $107.59 a fair deal?
- What I’d pack and how to plan your day
- Who this tour is best for (and who should consider another option)
- Should you book this Tasman Peninsula guided tour?
- FAQ
- Where does the tour start?
- How long is the Tasman Peninsula tour from Hobart?
- Is hotel pickup and drop-off included?
- What attractions are included during the day?
- Is lunch included in the price?
- How big is the group?
Key highlights to look for
- Hotel pickup and return to Princes Wharf so you can roll straight into the day
- Tessellated Pavement: a rare rock phenomenon that looks almost tile-like
- Devil’s Kitchen and Tasmans Arch: dramatic sea-carved cliffs with quick photo windows
- Remarkable Cave: a short walk with steps and a chance to get damp
- Local tastings: tea/coffee, Port Arthur Lavender treats, and stops for Tasmanian chocolate
From Hobart to the Tasman Peninsula: what makes this day work
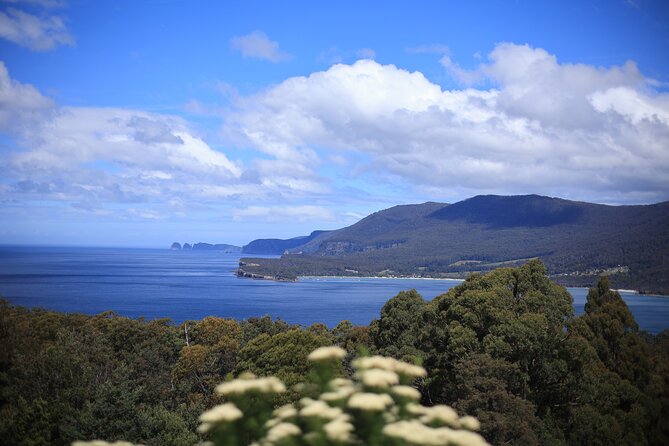
The Tasman Peninsula is one of those places where the scenery does most of the talking. You start the day in Hobart, then you’re out on the coast looking at ocean views, cliff formations, and rock textures that feel almost engineered. What makes this tour feel practical is how it sequences the day: viewpoints first, then landmark rock features, then breaks for food and shop stops.
This isn’t a tour built around colonial history. Instead, it leans hard into nature—sea spray, stone shapes, and coastal vistas. That matches what you want when you’re short on time in Tasmania: big visual payoffs with a guide to explain what you’re looking at.
It’s also a good “first peninsula” choice. Even if you’ve never been, the itinerary doesn’t assume you know the region. Your driver-guide handles the route, timings, and the stop-by-stop context, so you’re not juggling a map and a camera strap at the same time.
More of the Port Arthur Historic Site and the Tasman Peninsula
Pickup and timing: the small-group comfort factor
The tour starts at 8:30am from Princes Wharf No. 1 (Princes Wharf No. 1C on Castray Esplanade). Hotel pickup and drop-off are included, which matters more than it sounds. In practice, it removes the stressful part of day trips—getting to the right place at the right time, especially if you’re staying a bit off the waterfront.
You’ll be on the road for a good chunk of the day, with the full experience taking about 7 hours 30 minutes including travel time. The “small group” cap (max 11 travelers) is a real benefit here because the stops aren’t just photo ops. You’ll have moments to listen, move at a comfortable pace, and actually engage with your guide instead of watching them through a bus window.
One detail worth noting from recent feedback: this company and guide (Chaboo, with Wild Escapes Tasmania) are used to cruise schedules. If your arrival timing gets delayed, the guide keeps in touch and still aims to get you back in time for the ship’s all aboard. That kind of time-management can be a big deal if you’re doing this as a cruise excursion.
Stop-by-stop: what you’ll see and what to expect at each one
This is a coast-and-bites route with a sequence of landmark stops. Here’s how the day usually unfolds, plus the practical side of each stop.
Princes Wharf No. 1: start strong and easy
You begin at Princes Wharf No. 1C. If you’re coming in by cruise, this also helps because it keeps everything in one predictable corridor. The pickup point is the anchor for the day—once you’re on the vehicle, you can relax into the route.
My tip: arrive with a little buffer. One review mentioned the meeting point can be confusing at first glance, and the fix was shared for cruise ships. Even if it’s sorted now, giving yourself extra minutes is cheap insurance.
Tasman Bay National Park Lookout: quick break, real ocean views
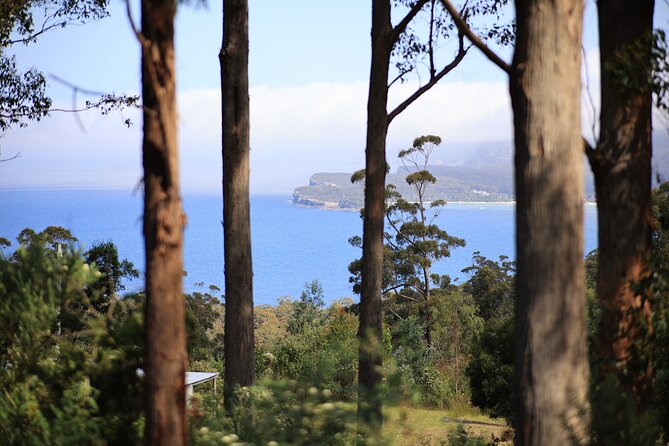
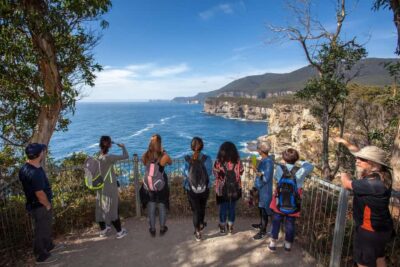
Next is the Tasman Bay National Park Lookout, with about 20 minutes there. This is your first proper ocean-and-coast hit. The tour also offers tea/coffee in this scenic setting, which is a nice touch because it turns the viewpoint into a mini reset instead of just a standing-photo moment.
Why it’s worth it: early in the day, it helps you orient. Once you’ve seen the ocean face and the coastline scale, the later rock formations make more sense.
More Tasmanian days made easy with a guide
- Maria Island Cruise and Guided Walk Day Tour with Lunch and Drinks
★ 5.0 · 617 reviews - Port Arthur Full-day Guided Tour with Harbour Cruise and Tasman National Park
★ 4.5 · 585 reviews - 7- 8 Hour StelaVino Guided Wine Tours From Hobart, Tasmania
★ 5.0 · 136 reviews - Grand Port Arthur with guided Isle of the Dead tour
★ 4.5 · 91 reviews - Tasmania: Wilderness and Wildlife Guided 6-Day Tour
★ 4.6 · 60 reviews
Tessellated Pavement: the rare rock “tiles” moment
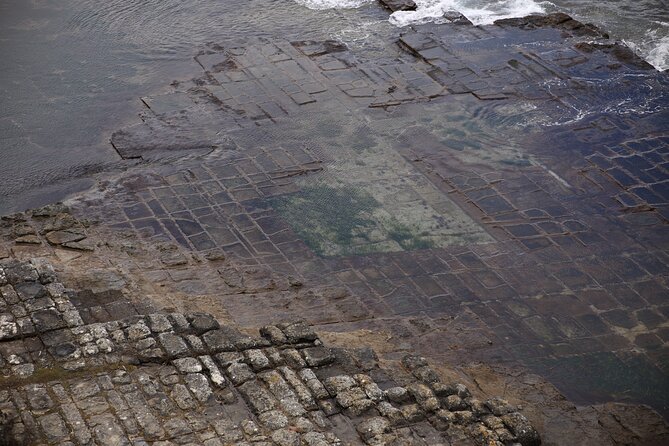
You’ll spend around 30 minutes at the Tessellated Pavement. This stop is famous for a natural phenomenon where fractured rocks form polygonal blocks that look almost like man-made paving.
What you’ll notice: it’s less about a single photo and more about spotting the pattern. Walk a bit, change angles, and look for the geometric lines. This is one of those places where a guide’s explanation makes the visuals click.
Potential drawback: it’s not a long stop, so if you hate timed sightseeing, keep your expectation realistic. You’ll want to be ready to move when the group moves.
Tasmans Arch and Devil’s Kitchen: quick, dramatic sea-carving
After Tessellated Pavement, the itinerary keeps momentum with two compact cliff stops:
- Tasmans Arch (about 10 minutes)
- Devil’s Kitchen (about 10 minutes)
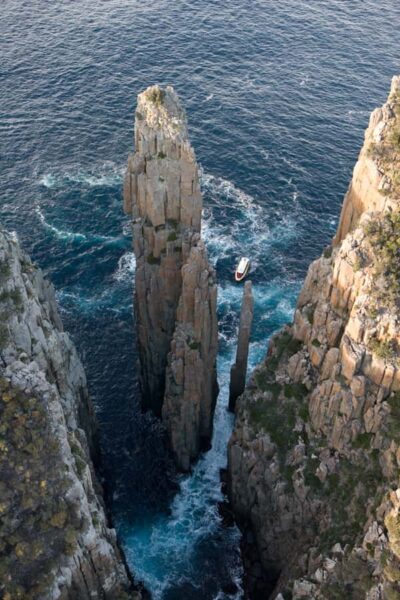
Both are sea-carved formations on the Tasman Peninsula, and both are designed for quick photo windows. These short durations can feel fast, but they work well for a full-day schedule because they prevent the day from bogging down in one spot.
My advice: treat these as “get the angles, then move” stops. If you try to linger too long, you can end up stressed about falling behind. The upside is you’ll see more landmarks without losing the thread.
Remarkable Cave: the wet-steps moment that many people remember
Remarkable Cave is one of the higher-drama parts of the day. You’ll spend about 25 minutes total, and the walk involves descending steps and doing about a 15-minute return. The tour notes to be prepared to get a little wet.
What you should do before you go in: wear grippy shoes and expect uneven footing. If it has rained recently, treat the steps like they could be slick. Bring a light layer if you run cold by the sea air, and consider a small towel or something you can wipe your hands with after.
Why it’s worth the effort: this is where the coastline moves from “looks cool” to “feels like you’re inside the geology.” Even with a short walk, you get that enclosed, echoing cave experience—then you pop back out for more views.
Port Arthur Lavender and Tasmanian Chocolate Foundry: breaks that actually fit the day
A common problem with day tours is that “food stops” are boring and rushed. Here, the stops are short and meaningful, and they give your legs and mind a break.
Port Arthur Lavender: lunch or coffee plus shop time
At Port Arthur Lavender, you’ll have about 1 hour 25 minutes. This is your longest break after the main coastal sequence. The stop offers lunch or coffee, and there’s time to browse lavender products. The tour description also points out ice cream and lavender items from the shop.
How to use the time well: if you want a proper sit-down meal, this is your best window. If you’re not hungry, coffee plus a treat is an easy way to keep energy up for the cave and chocolate later.
Trade-off: it’s a shop stop, so if you’re not into browsing, you may feel like the time is a bit “more than you need.” But the longer duration is also what makes the day feel balanced instead of constant motion.
Tasmanian Chocolate Foundry: a sweet final chapter
You finish with a stop at Tasmanian Chocolate Foundry in Taranna on the East Coast of Tasmania, around 20 minutes. This is a straightforward “pick up a snack” moment and a chance to grab something for later.
Why it works: by the end of the day, chocolate is the perfect low-effort souvenir. You’re not making a big detour; you’re just topping off the experience before heading back to Hobart.
Price and value: is $107.59 a fair deal?
The tour price is listed at $107.59 per person, and whether it feels like good value depends on what you’d otherwise spend doing the route yourself.
Here’s what you’re getting for that price:
- Guided tour with live commentary
- Hotel pickup and drop-off
- Photography services
- Multiple major natural stops on the Tasman Peninsula
- Small-group size (max 11)
The biggest cost you’re not covering is lunch. That’s the key downside. But because the itinerary includes a place where lunch or coffee is offered, it’s easy to handle without derailing the day.
For me, this is strongest value if you want the highlights—Tessellated Pavement, Tasmans Arch, Devil’s Kitchen, and Remarkable Cave—without renting a car, navigating narrow coastal roads, and timing all the pull-offs yourself. It’s also good value if you care about photos, since the tour explicitly includes photography services and a guide who’s willing to help you get set up.
What I’d pack and how to plan your day
This tour asks for comfortable shoes, and that’s not a suggestion you should ignore—Remarkable Cave is the place where footwear matters.
Bring:
- Comfortable, grippy shoes for steps and uneven surfaces
- A light rain layer or waterproof jacket in case the weather is moody
- Water and a small snack if you’re picky about meal timing (lunch isn’t included)
Timing mindset: plan for quick stops at the most dramatic cliff features. You’re not settling in for long hikes. You’re collecting “big moments” with guidance and then moving on.
Who this tour is best for (and who should consider another option)

This works really well if you:
- Want a one-day Tasman Peninsula overview from Hobart
- Prefer a small group with a guide you can actually talk to
- Like natural sights and don’t need a deep dive into colonial history
- Appreciate planned breaks for coffee, lavender treats, and chocolate
It may be less ideal if you:
- Hate any kind of steps or wet cave walks (Remarkable Cave involves descending steps)
- Want a fully lunch-included day (lunch isn’t included)
- Expect long “wander time” at each stop (several stops are intentionally short)
One of the standout parts of the experience from feedback: if the group is small or you’re the only booking, the tour can feel close to a private day. That personal attention can be a huge win for photos, questions, and pace.
Should you book this Tasman Peninsula guided tour?
If you want a simple, high-impact day on the Tasman Peninsula, I’d book it. The combination of hotel pickup, a tight small-group size (max 11), and major natural landmarks gives you a clean path through a famous region without the logistics headache.
The decision hinge is really this: if you’re okay buying lunch and you’re comfortable with steps and possibly damp conditions at Remarkable Cave, this is a strong value choice. If those are deal-breakers, you might want a different style of outing with more time flexibility.
If you do book, you’ll get the kind of day that runs on views, stops, and explanations rather than paperwork. And with guide Chaboo’s focus on getting people well-timed back to ships when needed, it’s the kind of tour that plays nicely with real-world schedules.
FAQ
Where does the tour start?
The tour starts at Princes Wharf No. 1C, Castray Esplanade, Hobart TAS 7000. The start time is 8:30am.
How long is the Tasman Peninsula tour from Hobart?
The total duration is about 7 hours 30 minutes, including travel time.
Is hotel pickup and drop-off included?
Yes. Hotel pickup and drop-off are included, and the tour ends back at the meeting point.
What attractions are included during the day?
The day includes stops such as Tasman Bay National Park Lookout, Tessellated Pavement, Tasmans Arch, Devil’s Kitchen, Port Arthur Lavender, Remarkable Cave, and Tasmanian Chocolate Foundry.
Is lunch included in the price?
No. Lunch is not included. Port Arthur Lavender offers lunch or a cup of coffee during its longer stop.
How big is the group?
The tour is limited to a maximum of 11 travelers.
More Tours in Hobart
- Bruny Island Food, Sightseeing, Guided Lighthouse Tour & Lunch
★ 5.0 · 2,989 reviews - Full-Day Guided Bruny Island Tour from Hobart
★ 5.0 · 1,331 reviews - kunanyi/Mt Wellington Explorer Bus- Return Tour (2.5 hours)
★ 5.0 · 1,249 reviews - From Hobart: Full-Day Bruny Island Tour with Guide
★ 4.7 · 755 reviews - Day Tour in Mt. Field, Mt. Wellington, Bonorong Wildlife Sanctuary and Richmond
★ 5.0 · 735 reviews
More Tour Reviews in Hobart
- Bruny Island Food, Sightseeing, Guided Lighthouse Tour & Lunch
★ 5.0 · 2,989 reviews - Full-Day Guided Bruny Island Tour from Hobart
★ 5.0 · 1,331 reviews - kunanyi/Mt Wellington Explorer Bus- Return Tour (2.5 hours)
★ 5.0 · 1,249 reviews - Hobart: kunanyi/Mt Wellington Explorer Bus Pass
★ 4.8 · 848 reviews - Bruny Island Traveller – Gourmet Tasting and Sightseeing Day Trip from Hobart
★ 5.0 · 786 reviews
The Port Arthur Historic Site
- Port Arthur Full-day Guided Tour with Harbour Cruise and Tasman National Park
★ 4.5 · 585 reviews - Tasman Island Cruises and Port Arthur Historic Site Day Tour from Hobart
★ 5.0 · 477 reviews - Hobart: Port Arthur & Tasman Park Full-Day Trip with Cruise
★ 4.6 · 442 reviews - Port Arthur and Tasman Sights with Harbour Cruise
★ 5.0 · 352 reviews - Hobart: Port Arthur, Richmond & Tassie Devil – Active Tour
★ 4.8 · 351 reviews
Just Added: Fresh Hobart and Tasmania Reviews





Port Arthur & the Tasman Peninsula, compared.
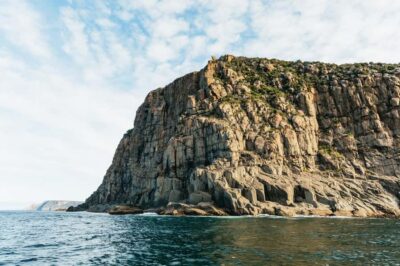 ★ 4.9From Port Arthur: Tasman Island Wilderness CruiseFrom $127704 reviews
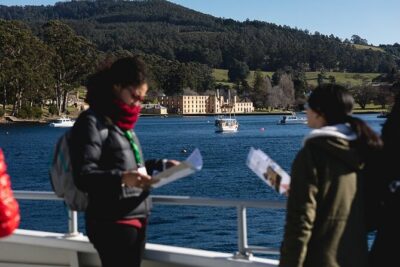 ★ 4.5Port Arthur Full-day Guided Tour with Harbour Cruise and Tasman National ParkFrom $121585 reviews
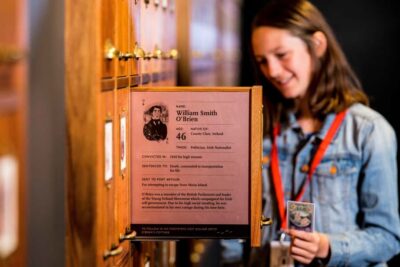 ★ 4.8Port Arthur Historic Site Admission and Tour OptionsFrom $37509 reviews
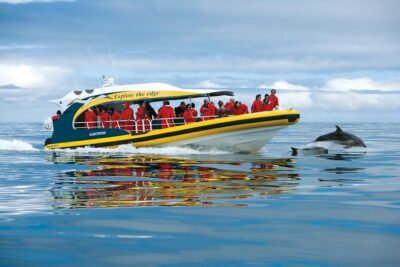 ★ 5.0Tasman Island Cruises and Port Arthur Historic Site Day Tour from HobartFrom $236477 reviews
 ★ 4.6Port Arthur & Tasman Park Full-Day Trip with CruiseFrom $120442 reviews
 ★ 5.0Port Arthur and Tasman Sights with Harbour CruiseFrom $35352 reviews
 ★ 4.8Port Arthur, Richmond & Tassie Devil – Active TourFrom $138351 reviews
 ★ 4.9Tasman Peninsula Tour, Cruise & Port Arthur Historic SiteFrom $233339 reviews
Browse the lists this tour appears in