
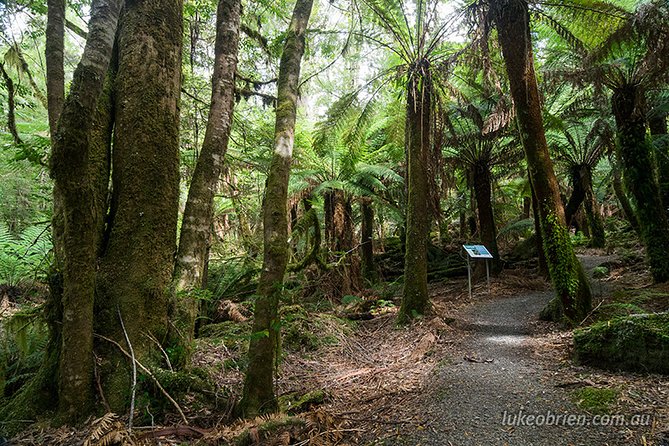
Reviewed · MOUNT FIELD NATIONAL PARK & RUSSELL FALLS
Mt Field and Styx Valley Photography Tour
First light and waterfalls make great teachers. This Mt Field and Styx Valley Photography Tour is built for real camera practice in Tasmania’s forest, with a professional photographer guide calling out settings and composition as you go. You’re not just sightseeing—you’re learning how to see and how to shoot.
I especially like the hands-on coaching and the printed tutorial sheets you take home, which makes the lessons stick. My other big plus is the included lunch at a local cafe, so you can keep your energy up between photo stops. One consideration: hotel pickup is offered only for selected hotels, so if yours isn’t on the list, you’ll need to make your way to the meeting point in Hobart.
In This Review
- Key highlights that make this tour worth your time
- Why Mt Field and Styx Valley are a camera-friendly combo
- Getting picked up in Hobart and meeting Luke O’Brien Photography
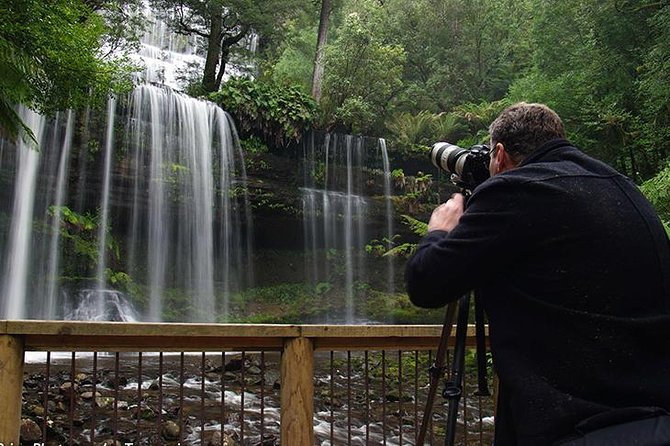
- Russell Falls in Mt Field: learning to tame moving water
- Horseshoe Falls: composition tricks for width, texture, and scale
- Styx Valley near Maydena: getting tall-tree photos without rushing
- How the photo coaching works: pointers you can actually use again
- Timing, walking, and what a 9-hour day feels like
- Lunch at a local cafe: fuel for camera work
- Price and value: what you’re really paying for
- Who should book this photography tour (and who might not)
- Should you book the Mt Field and Styx Valley Photography Tour?
- FAQ
- What time does the tour start in Hobart?
- How long is the Mt Field and Styx Valley Photography Tour?
- Is lunch included?
- Are national park fees and entry tickets included?
- Does the tour include hotel pickup?
- Can I cancel for free?
Key highlights that make this tour worth your time
- Small group (up to 6 travelers) means you get actual attention and specific pointers, not vague advice.
- Luke O’Brien Photography leads the day, so your lessons come from someone who works through real nature-photo challenges.
- Russell Falls and Horseshoe Falls get dedicated time for shooting and adjusting on the spot.
- Styx Valley is free admission and gives you space for slower, more exploratory tree-and-forest photos.
- Printed tutorial sheets help you repeat what you learned after the tour, not just remember it for a day.
Why Mt Field and Styx Valley are a camera-friendly combo
Tasmania can be a photographer’s happy place because the light changes, the trees are dramatic, and water gives you instant visual impact. Mt Field National Park delivers that classic “Tasmania waterfall” look at Russell Falls and Horseshoe Falls, and the surrounding forest gives you plenty of framing options. Styx Valley then shifts the vibe from waterfall drama to tall-tree scale—perfect if you want wide shots, strong verticals, and compositions that feel bigger than your lens.
What makes this pairing especially smart is that it covers two different types of nature photography in one day. In the morning you’re learning how to manage bright water, mist, and motion. In the afternoon you’re working with forest depth, textured bark, and tall eucalyptus forms—often the hardest subject for people who mainly shoot landscapes.
You’ll leave with more than photos. You’ll understand why a shot works—where to stand, what to include, how to control focus and exposure, and how to keep moving your camera without losing time. That’s the real value of a guided photo day.
More trips to Mount Field and Russell Falls
Getting picked up in Hobart and meeting Luke O’Brien Photography
The tour starts at 8:30 am at the Tasmanian Travel & Information Centre in Hobart (Corner of Elizabeth St and Davey St). The day ends back at the meeting point. If your accommodation is in the selected pickup zone, you can use the hotel pickup and drop-off—otherwise plan to start from the information centre.
What I like about this setup is that it removes one of the biggest headaches for a photography trip: transport. You’re not stuck figuring out parking, driving between stops, or timing yourself around photo windows. Your guide handles the driving in a private vehicle, which keeps the day focused on what matters: shooting, adjusting, and walking to the best angles.
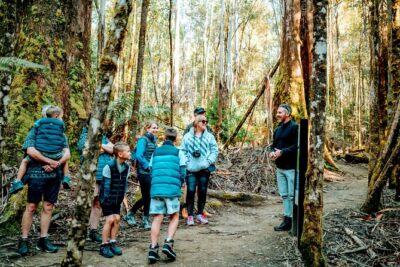
Luke O’Brien Photography runs the experience, and the style from the day’s description is very practical: you’re coached on the ins and outs of nature photography, then immediately applying it at each stop. In a group this small, that coaching can stay personal—if you’re shooting on a phone, a compact, or a DSLR/mirrorless, you should be able to get pointers that match what you’re actually using.
Russell Falls in Mt Field: learning to tame moving water
Russell Falls is your first major photo stop, with about 1 hour 30 minutes allocated for shooting in Mt Field National Park. This is where the day’s learning starts to become real, because waterfalls force you to solve multiple problems at once: motion blur, water brightness, and the challenge of composing a scene that looks good from several angles.
Expect to work on basics that matter here:
- How to position yourself so the falls don’t look chopped off.
- How to keep the waterfall in the frame while including enough of the surrounding forest for context.
- How to adjust settings as the light shifts under trees and across wet rock.
In a guided setting, the best part is timing. If you only arrive, snap a few quick photos, then move on, you miss the chance to experiment. Here you get time to try one approach, review it, and tweak—so you can figure out what your camera is doing and what you are controlling. That’s how you go from random waterfall shots to intentional ones.
A bonus: shooting early often means calmer conditions and softer light under the forest canopy. Even if the weather isn’t perfect, the guide’s job is to help you work with what you’ve got rather than waiting for ideal clouds.
Horseshoe Falls: composition tricks for width, texture, and scale
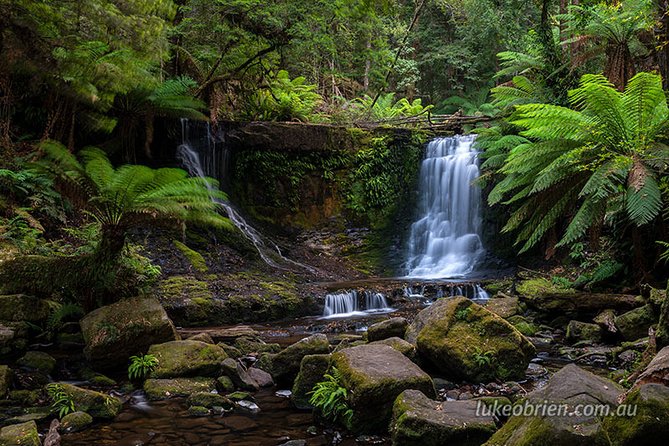
Next up is Horseshoe Falls, again with about 1 hour 30 minutes in Mt Field National Park. This stop is a great follow-up because Horseshoe Falls is different enough to make you change your thinking—especially if you’re trying to avoid repeating the same composition you used at Russell Falls.
This is also where you can benefit if you’re already comfortable with photography. The tour description explicitly signals that more experienced photographers can use this time to work on panoramic shots and tackle the bigger-scale feeling of the park. Even if you’re not chasing panoramas, the falls are a natural subject for practicing:
- Focal length choices (wide vs. tighter framing)
- Where to place the horizon and leading lines
- How to show scale without making the scene look empty
Water plus forest texture is forgiving in a way, but it’s also sneaky. Wet surfaces can fool your exposure, and dark tree shadows can trick your camera’s auto modes. The guide’s value is in helping you notice these moments and correct fast, so you get shots you’d actually print or share.
And if you’re the type who loves details, you’ll likely find that the walk between viewpoints invites close-up attention too. That’s where you start building a mini photo story: not just “a waterfall,” but “a waterfall in a living forest.”
Styx Valley near Maydena: getting tall-tree photos without rushing
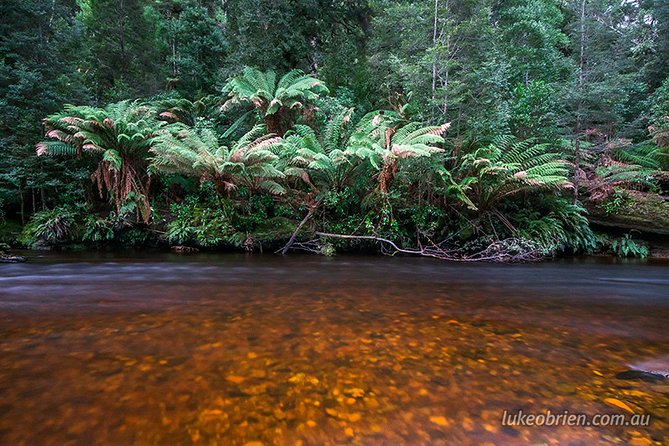
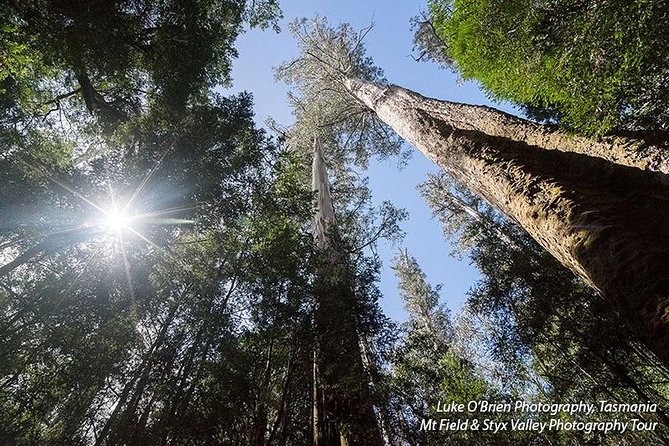
After the morning waterfall focus, the tour heads to Styx Valley near Maydena for about 3 hours. Admission there is listed as free, and that matters because it gives you more time to slow down and photograph without feeling like you need to beat a ticket clock.
Styx Valley is where the tour becomes a different kind of photo challenge. Instead of motion and brightness, you’re working with:
- Vertical structures and strong tree forms
- Forest depth and distance
- Textures in bark, leaves, and ground detail
- The problem of photographing something that feels huge in a frame that’s small
This is a good stop if you want variety in your final set of images. Morning shots will often be centered on the falls. Afternoon shots can shift to wider scenes, upward angles, and “walk-and-discover” compositions. If you enjoy the process of finding the exact angle—moving two steps left, waiting for a change in light, adjusting your tilt—this part of the day can feel especially satisfying.
One practical tip for this stop: bring patience for slower shooting. In forests, your best framing often comes from taking your time with what’s around the subject. The guide’s job here is to help you notice those details while keeping you on schedule for the full day.
- Bruny Island Food, Sightseeing, Guided Lighthouse Tour & Lunch
★ 5.0 · 2,989 reviews - Full-Day Guided Bruny Island Tour from Hobart
★ 5.0 · 1,331 reviews - kunanyi/Mt Wellington Explorer Bus- Return Tour (2.5 hours)
★ 5.0 · 1,249 reviews - Hobart: kunanyi/Mt Wellington Explorer Bus Pass
★ 4.8 · 848 reviews - Bruny Island Traveller – Gourmet Tasting and Sightseeing Day Trip from Hobart
★ 5.0 · 786 reviews
How the photo coaching works: pointers you can actually use again
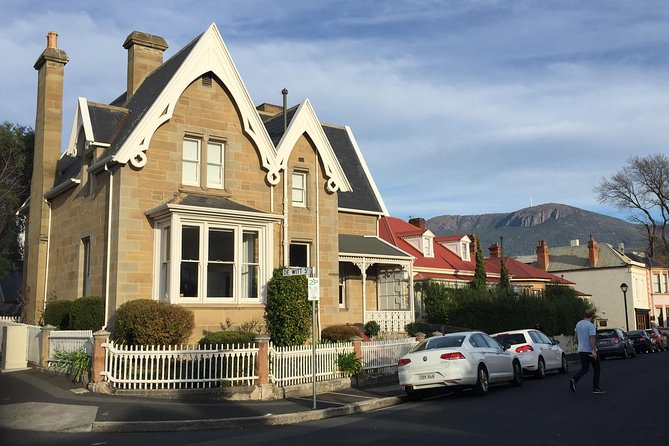
This tour isn’t only about where you go. It’s about how you shoot when you’re there. The day is designed around learning “the ins and outs of nature photography,” then using what you learn immediately at the waterfalls and in the valley.
The most useful part for many people is the mix of quick guidance and time to practice. Instead of one long lecture, you’ll get personalized pointers and then try your own approach. A small group size (maximum of 6 travelers) helps a lot here, because the guide can adjust advice to what you’re struggling with—whether that’s getting sharp images, choosing a shutter speed for water, or balancing exposure in shady forest light.
You also take home printed tutorial sheets. I like that because it turns the day into a repeatable skill. When you get home and look at your photos, you can refer to what you practiced and see what you did right (and what to improve next time). That’s how a photo day becomes more than a nice outing.
If you’re already an experienced shooter, the structure still helps because nature subjects don’t follow “textbook” rules. Conditions change fast, and the guide’s role is to help you adjust rather than get stuck using one settings recipe all day.
Timing, walking, and what a 9-hour day feels like
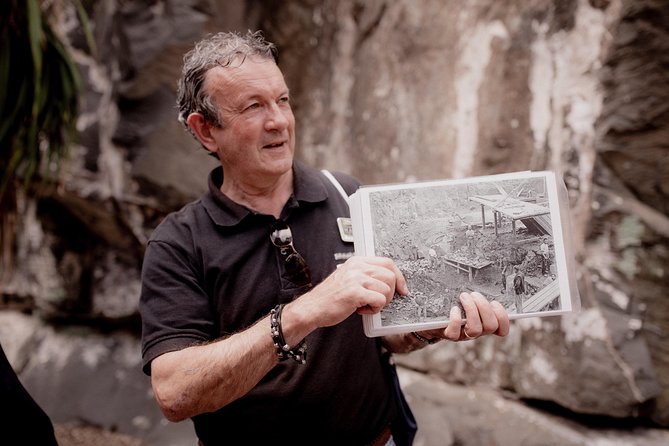
This is a 9-hour experience that runs from 8:30 am until you’re back at the meeting point. The day is paced with two morning stops (each about 1 hour 30 minutes) and one longer afternoon stop (about 3 hours at Styx Valley), plus lunch in between.
For your planning, think of it as a full but manageable day. You’ll do enough walking to get to good angles and viewpoints, but the schedule also leaves room to pause for shooting and for the guide to give advice. The tour notes that most travelers can participate, which usually means it’s not designed as extreme hiking.
Still, nature photography days can be tiring. If you know you get sore on uneven ground or in weather-changing conditions, plan accordingly with comfortable footwear and layers. The most common mistake is showing up underdressed for Tasmanian forest temperatures and then losing energy mid-day—which kills your chances of getting the shots you came for.
Lunch at a local cafe: fuel for camera work
Lunch is included and served at a local cafe. That sounds simple, but it matters on a photo tour because food timing affects your ability to shoot. If you skip lunch or eat something you have to rush, your concentration drops. The included lunch keeps you steady for the afternoon session at Styx Valley.
Alcoholic drinks are available for purchase, but the core meal isn’t dependent on that. If you’re photographing all day, it’s smart to keep alcohol optional, especially if you want crisp, careful compositions when light changes.
This is also one of the small value wins of the tour. You’re not adding extra spending for lunch while also paying for transport and national park access. The day stays focused on what you planned: learning, shooting, and enjoying Tasmania’s forest scenes.
Price and value: what you’re really paying for
At $222.73 per person, this tour sits in the “special experience” category, so it’s fair to ask what’s included beyond the obvious.
Here’s what you get that directly affects photo results:
- Professional photographer guide (Luke O’Brien Photography)
- Hotel pickup/drop-off (selected hotels only) plus private transport
- National park fees included
- Lunch included
- Admission tickets included for Russell Falls and Horseshoe Falls
- Styx Valley admission listed as free
- Small group size (maximum 6)
- Mobile ticket
So what are you paying for, really? Time with a guide who can help you make better choices fast. Waterfalls and forest scenes aren’t hard because they’re “beautiful”—they’re hard because your camera settings and framing decisions are tested in real conditions. The coaching reduces trial-and-error, and that can save you hours of frustration.
The other value factor is convenience. No rental car means less hassle and more time looking through your viewfinder instead of reading maps. If you already know how to drive in Tasmania and want independence, you could do this on your own. But if your goal is better photos and faster learning, the guided structure justifies the price.
Who should book this photography tour (and who might not)
This tour is a strong match if you want:
- A small-group day with close guidance
- A pro photographer teaching nature photography basics and practical settings
- Dedicated shooting time at Russell Falls, Horseshoe Falls, and Styx Valley
- A take-home learning tool (the printed tutorial sheets)
If you’re newer to photography, you’ll likely appreciate the clear structure and the chance to practice immediately after receiving tips. If you’re more experienced, you can use the time to experiment with wider compositions and panoramic ideas, especially around the waterfalls and the park’s large tree forms.
Who might think twice? If you prefer very independent travel with no structured stops, a guided photo itinerary may feel limiting. Also, if your hotel is not in the pickup area, you’ll need to handle getting to the meeting point at 20 Davey St / Elizabeth St. Finally, if you’re not comfortable with a full day that involves walking between photo viewpoints, plan your comfort level before booking.
Should you book the Mt Field and Styx Valley Photography Tour?
Yes—if your main goal is to improve your photos in real forest conditions without wasting daylight on guesswork. The biggest win is the combination of small-group attention and immediate application at the actual locations, led by Luke O’Brien Photography. Add included fees, transport, and lunch, and you get a day that’s easy to commit to and easy to follow.
I’d book especially if you want waterfall images that look intentional and not accidental, and if you also want an afternoon shift into tall-tree forest photography rather than only shooting water.
If you’re the kind of traveler who just wants scenic photos with zero learning focus, you might not feel you’re getting full value. But if you care about technique—even a little—this is the kind of tour that gives you something to bring home besides memories.
FAQ
What time does the tour start in Hobart?
It starts at 8:30 am at the Tasmanian Travel & Information Centre (corner of Elizabeth and Davey St, 20 Davey St, Hobart).
How long is the Mt Field and Styx Valley Photography Tour?
The duration is about 9 hours.
Is lunch included?
Yes. Lunch at a local cafe is included.
Are national park fees and entry tickets included?
Yes. National park fees are included, with admission tickets included for Russell Falls and Horseshoe Falls. Styx Valley admission is listed as free.
Does the tour include hotel pickup?
Hotel pickup and drop-off are offered for selected hotels only. Otherwise, you’ll meet at the listed Hobart meeting point.
Can I cancel for free?
Yes. You can cancel up to 24 hours in advance for a full refund. Canceling within 24 hours of the start time isn’t refundable.
More Tours in Hobart
- Bruny Island Food, Sightseeing, Guided Lighthouse Tour & Lunch
★ 5.0 · 2,989 reviews - Full-Day Guided Bruny Island Tour from Hobart
★ 5.0 · 1,331 reviews - kunanyi/Mt Wellington Explorer Bus- Return Tour (2.5 hours)
★ 5.0 · 1,249 reviews - From Hobart: Full-Day Bruny Island Tour with Guide
★ 4.7 · 755 reviews - Day Tour in Mt. Field, Mt. Wellington, Bonorong Wildlife Sanctuary and Richmond
★ 5.0 · 735 reviews
More Tour Reviews in Hobart
- Bruny Island Food, Sightseeing, Guided Lighthouse Tour & Lunch
★ 5.0 · 2,989 reviews - Full-Day Guided Bruny Island Tour from Hobart
★ 5.0 · 1,331 reviews - kunanyi/Mt Wellington Explorer Bus- Return Tour (2.5 hours)
★ 5.0 · 1,249 reviews - Hobart: kunanyi/Mt Wellington Explorer Bus Pass
★ 4.8 · 848 reviews - Bruny Island Traveller – Gourmet Tasting and Sightseeing Day Trip from Hobart
★ 5.0 · 786 reviews
Mount Field and Russell Falls
- Day Tour in Mt. Field, Mt. Wellington, Bonorong Wildlife Sanctuary and Richmond
★ 5.0 · 735 reviews - Hobart: Mt Wellington, Mt Field, Bonorong and Richmond Trip
★ 4.8 · 722 reviews - From Hobart: Mt. Field, Mt. Wellington and Wildlife Day Tour
★ 4.8 · 261 reviews - Hobart: Mt. Field, Mt Wellington & Wildlife – Active Day Tour
★ 5.0 · 112 reviews - Mt Field National Park and Russell Falls from Hobart
★ 5.0 · 49 reviews
Just Added: Fresh Hobart and Tasmania Reviews




Mount Field National Park & Russell Falls, compared.
 ★ 5.0Day Tour in Mt. Field, Mt. Wellington, Bonorong Wildlife Sanctuary and RichmondFrom $128735 reviews
 ★ 4.8Mt Wellington, Mt Field, Bonorong and Richmond TripFrom $126722 reviews
 ★ 4.8Mt. Field, Mt. Wellington and Wildlife Day TourFrom $130261 reviews
 ★ 5.0Mt. Field, Mt Wellington & Wildlife – Active Day TourFrom $132112 reviews
 ★ 5.0Mt Field National Park and Russell Falls from HobartFrom $12949 reviews
 ★ 4.6Mt. Field National Park and Russell FallsFrom $12741 reviews
 ★ 5.0Peaks, Falls & Furry Locals: Mt. Field & the DerwentFrom $71018 reviews
 ★ 4.0Mt Field National Park & Wildlife Shore ExcursionFrom $1306 reviews
Browse the lists this tour appears in