
Reviewed · RICHMOND VILLAGE & COAL RIVER VALLEY
Coal River Wine Hopper
Coal River wine sounds good already. The Coal River Wine Hopper is a smart, no-drama way to hit several Tasmanian cellar doors in one day—without playing designated-driver roulette. You choose your pace with a hop-on hop-off style schedule, and you still end up seeing the classic stop in Richmond.
What I like most is the freedom to build your own day, then relax while the air-conditioned vehicle does the moving. I also love that you get carry-on wine bags, so buying a few bottles doesn’t turn into a backpack shuffle all afternoon.
One thing to plan for: you’ll need to pre-book some cellar-door times ahead of the day, especially if you’re set on Pooley’s.
In This Review
- Key highlights worth planning for
- Why this Wine Hopper day trip works from Hobart
- Price and timing: what $63.12 buys you
- The “choose your own pace” style: how to plan your day
- Stop 1: Coal Valley Vineyard for scenic starts
- Stop 2: Craigow Vineyard’s rolling-hills feel
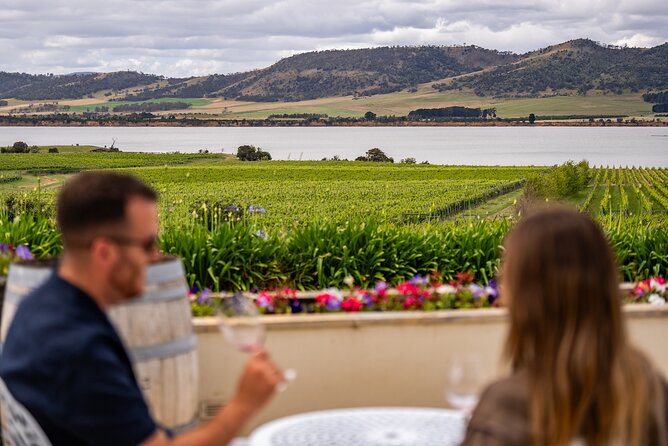
- Stop 3: Puddleduck Wines and those lake views
- Stop 4: Every Man and His Dog Vineyard for the chocolate pairing
- Stop 5: Pooley’s Wines in Cambridge for the showpiece setting
- Stop 6: Richmond for Georgian streets and the Richmond Bridge
- Getting around inside the day: vehicle comfort and group size
- Your guide: Alex keeps it friendly and not rushed
- What you need to know about wine bags, lunch, and taste pacing
- Who this tour is best for (and who might want something else)
- Should you book the Coal River Wine Hopper?
- FAQ
- How long is the Coal River Wine Hopper?
- What time does the tour start, and where does it begin?
- What’s included in the tour price?
- Is lunch or alcohol included?
- Do I need to pre-book cellar doors?
- How many people are on the tour?
- What is the cancellation policy?
Key highlights worth planning for
- Hop-on, hop-off flexibility so you can linger where you enjoy the vibe most
- Up to 26 people max, which keeps the day feeling manageable
- Carry-on wine bags provided for easier bottle transport back to Hobart
- Multiple cellar doors plus a Richmond stop in one roughly 7-hour outing
- Guide Alex gets praise for being friendly, helpful, and keeping things from feeling rushed
- Pooley’s needs bookings at all times, so lock that in early
Why this Wine Hopper day trip works from Hobart
Tasmania’s wine country is spread out, and that’s the whole trick with this tour: you don’t have to solve the logistics by yourself. The Coal River Wine Hopper is designed to help you check off several well-known stops in the Coal River Valley area, plus a heritage-style break in Richmond.
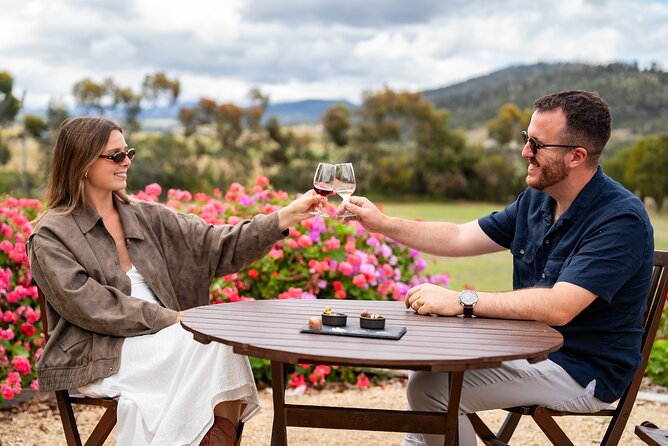
I like how the day is set up so you can steer it. If you want a quick pour and move on, you can. If a place hits your taste buds, you can stay put and enjoy the scenery without feeling like you’re falling behind.
And yes, the designated-driver angle matters. You’re on a tour schedule, so you can focus on the fun parts—tasting, chatting, and taking photos—rather than calculating how many glasses you can safely handle.
More of the Tasmanian wine and whisky trail


Price and timing: what $63.12 buys you
At $63.12 per person, the real value isn’t just the wine. It’s the transport, the structure, and the time you save. A day that strings together multiple cellar doors can be expensive if you’re paying for separate tours, extra rides, or last-minute help.
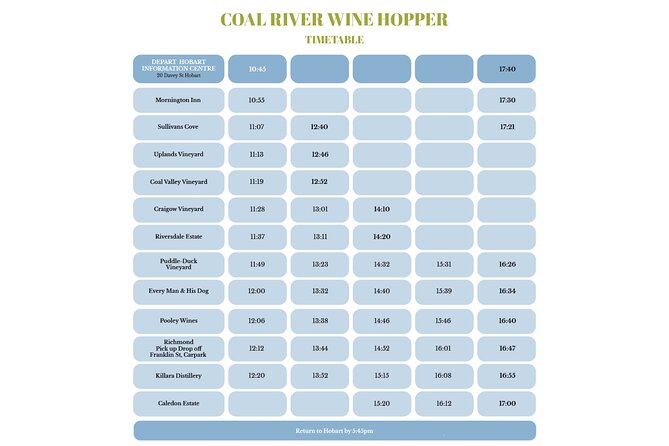
The tour runs about 7 hours, starting at 10:45 am from the Tasmanian Travel & Information Centre on Davey Street. You get back to the same meeting point at the end, which keeps the day simple. There’s also a mobile ticket, so you’re not hunting for paper tickets on the day.
One practical note: the itinerary is built around scheduled stops, but you’re not stuck at each place for an identical experience. You’ll spend around 1 hour at each listed stop, and you can shape your day within that rhythm.
The “choose your own pace” style: how to plan your day
This is a hop-on hop-off format, which means you can tailor your itinerary instead of being forced into one tight sequence. That’s great when you know your own travel style. If you’re the type who wants to talk with staff and ask questions, build a bit more time into the cellar doors you care about most.
To make that happen smoothly, you should decide your must-do stops before you arrive. Then, use the rest of the time as your flexibility buffer.
Also, plan your expectations on food and alcohol. The tour doesn’t include lunch or alcoholic beverages. That’s not a deal-breaker, but it does mean you’ll want to think about how you’ll handle tasting without getting hangry.
Stop 1: Coal Valley Vineyard for scenic starts
Coal Valley Vineyard is one of the key starting points on the route. Expect a relaxed hour where you can enjoy the outdoors, take in the views, and taste the wines on offer.
This stop is a good “warm-up” for the day. It gives you an early sense of the region—green surroundings, calm atmosphere, and that feeling of being in a working vineyard rather than a museum shop.
The possible drawback? Since you’re starting in a scenic, tasting-focused setting, it’s easy to overestimate how quickly you’ll want to move to the next stop. If you’re sensitive to long tasting lines or want to maximize the number of wineries you visit, pace yourself here.
Stop 2: Craigow Vineyard’s rolling-hills feel

Craigow Vineyard brings a different vibe with its rolling hills, vineyards, and expansive pastures. It’s the kind of setting where the views are part of the tasting experience, not just background decoration.
You’ll get about one hour, which is usually enough time to do a couple of pours, ask a few questions, and settle into the landscape. This is also a solid place to compare styles across cellar doors—especially if you’re the type who enjoys noticing subtle differences between wines from neighboring areas.
The watch-out: because this tour is designed for flexible pacing, you might feel tempted to stay longer at the places you like. Remember that the day is built around multiple scheduled stops, so if you run late at one stop, the rest can compress.
More afternoons in Richmond and the Coal River Valley
- Day Tour in Mt. Field, Mt. Wellington, Bonorong Wildlife Sanctuary and Richmond
★ 5.0 · 735 reviews - Hobart: Mt Wellington, Mt Field, Bonorong and Richmond Trip
★ 4.8 · 722 reviews - Wineglass Bay & Freycinet NP Full Day Tour from Hobart via Richmond Village
★ 5.0 · 476 reviews - Hobart: Wineglass Bay, Freycinet Park, and Richmond Tour
★ 4.8 · 371 reviews - Hobart: Port Arthur, Richmond & Tassie Devil – Active Tour
★ 4.8 · 351 reviews
Stop 3: Puddleduck Wines and those lake views
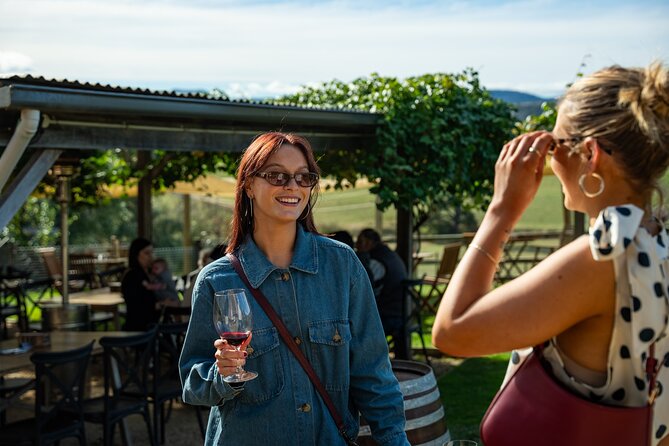
Puddleduck Wines is all about atmosphere. You can choose to sit on an outdoor deck overlooking the lake, or take your time strolling through the vines. Either way, the views are part of the point.
If you’re the type who enjoys tasting with a bit of downtime—slow sips, photos, and a moment to breathe—this stop can be a favorite. The hour here can feel like a mini escape without you needing to plan anything extra.
A practical consideration: since the tour includes several wine stops, you’ll want to keep track of what you’ve already tasted and what you want to revisit later. With no lunch included, having a snack strategy helps a lot at this stage of the day.
Stop 4: Every Man and His Dog Vineyard for the chocolate pairing
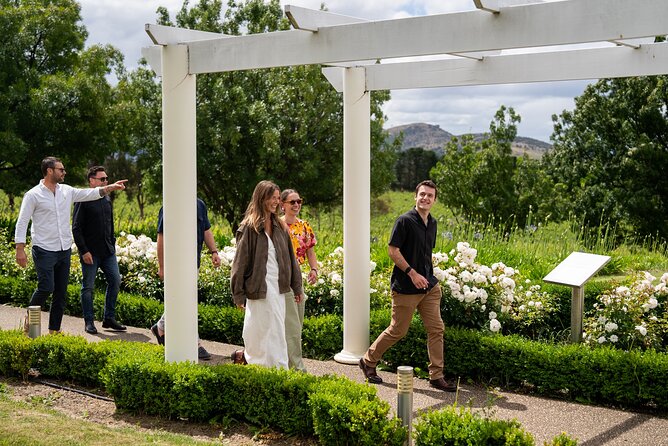
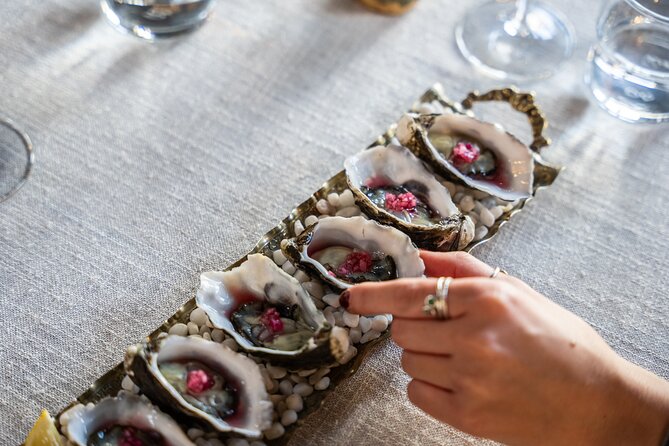
Every Man and His Dog Vineyard is a great option if you like a little non-wine fun mixed into your tasting day. Alongside their wine selection, they offer handmade chocolates, and the idea here is simple: pair sweetness with your pours and enjoy the contrast.
This is also a nice “reset” stop. Wine tastings can blur together, and a chocolate-and-wine moment gives your brain a palate refresh. You’ll still get about one hour here, so it’s an easy place to enjoy without turning the day into a marathon.
One drawback to keep in mind: if you’re focused strictly on wine flights and don’t care about pairings, you might want to move at a quicker pace. The upside is that this stop gives you an extra sensory experience even if you don’t go deep into purchasing.
Stop 5: Pooley’s Wines in Cambridge for the showpiece setting
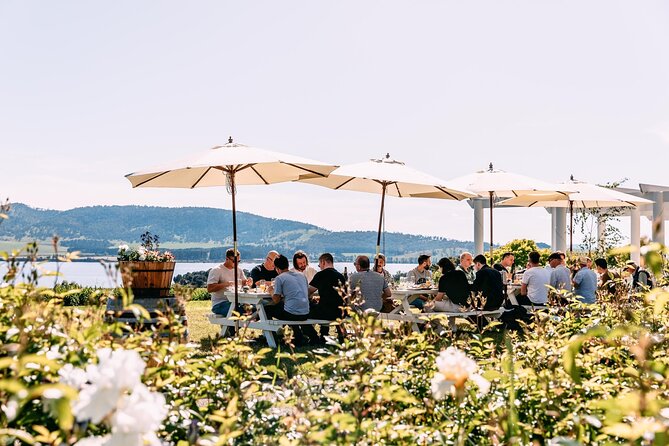
Pooley Wines is the stop many people circle ahead of time. It’s perched on the slopes of Butchers Hill in Cambridge, and the setting is known for breathtaking views over the Coal River Valley area.
For this stop, planning ahead matters more than usual. The day tour requires you to pre-book the cellar doors you want to visit, and Pooley’s needs bookings at all times. So if Pooley’s is on your must-try list, don’t treat it like a last-minute maybe.
You’ll get about one hour at Pooley’s. That’s usually enough time to taste, check out the place, and decide if you want to take a bottle home (and yes, that carry-on wine bag will come in handy).
The main consideration here is schedule pressure. If you’re hoping to do Pooley’s plus multiple other tastings, set your expectations for how much you can realistically enjoy in one day.
Stop 6: Richmond for Georgian streets and the Richmond Bridge
The tour doesn’t end at wine. You also get time in Richmond, famous for well-preserved Georgian buildings and cobblestone streets. It feels like a step back in time, and it’s the kind of stop that helps your day feel complete rather than nonstop tasting.
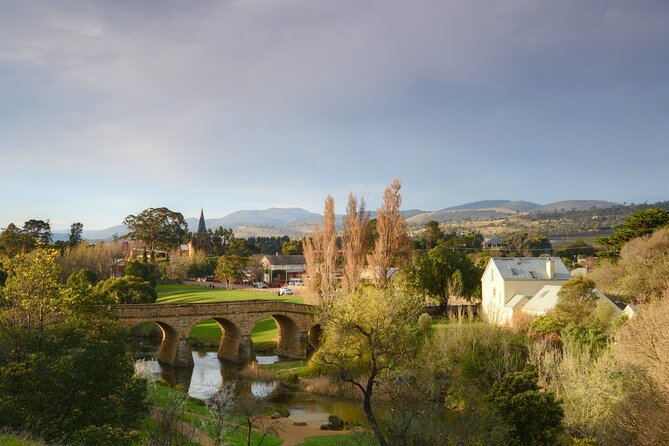
You’ll have about one hour here. That’s plenty to walk around, snap photos, and take in the centerpiece: the Richmond Bridge, described as Australia’s oldest sandstone bridge still in use.
The trade-off is time. If your wine priorities are strong, you might wish Richmond could be longer. But as a break between cellar doors, this is a smart palate-and-brain reset.
Getting around inside the day: vehicle comfort and group size
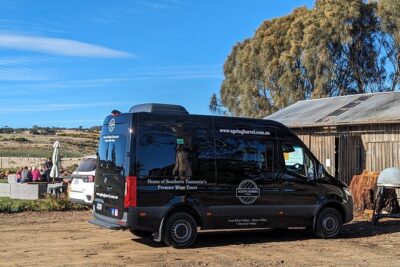
Transportation is included, and you’ll ride in an air-conditioned vehicle. That matters in Tasmania because weather can shift and wine days involve outdoor viewing.
The group size is capped at 26 participants, which is large enough that you’ll meet different people, but small enough that the day doesn’t turn into chaos. You should feel like you’re part of the group, not just one more person herded between stops.
Your guide: Alex keeps it friendly and not rushed
One of the most praised parts of the experience is the tour guide. Alex comes up in the feedback for being friendly and accommodating, and for making the schedule feel relaxed. That’s a big deal on a day like this, where you’re bouncing between tasting rooms and walking between stops.
A good guide can also help you stay focused on what matters: pacing yourself, knowing when to move on, and keeping the day smooth. If you’re prone to overthinking itineraries, this helps. You don’t have to micromanage the day—Alex helps keep it moving without making it feel like a sprint.
What you need to know about wine bags, lunch, and taste pacing
The tour provides carry-on wine bags, which is practical and genuinely useful. Buying bottles on a day out in a car can turn into a mess fast. With the bags sorted for you, you can taste, decide, and move on without worrying about how you’ll pack up your purchases.
Just remember what’s not included:
- Lunch is not included
- Alcoholic beverages are not included
That doesn’t mean you can’t enjoy the wineries. It means you should plan to bring or buy food so you’re not relying on tasting rooms alone. A simple snack strategy helps you enjoy more of the day and make better buying decisions.
Also, since you’ll likely taste at several stops, pacing matters. You don’t want to arrive at Pooley’s (or Richmond) feeling like you need a nap. Take water breaks, share tastes when appropriate, and consider buying only what you genuinely want to remember.
Who this tour is best for (and who might want something else)
This is a great choice if you want:
- multiple cellar doors in one day
- flexibility to choose your pace
- included transport so you don’t arrange separate rides
It’s especially appealing if you’re traveling in a way where you’d rather not drive yourself through the region, or you don’t want to spend your day building an itinerary from scratch.
It might not be the best fit if you prefer a deeply guided wine education session at one or two places. This tour spreads you across several stops, so it’s more about variety and convenience than spending all day learning one specific producer’s story.
Should you book the Coal River Wine Hopper?
I think you should book it if your goal is a full, easy day that mixes wine tasting with a heritage town stop, and you like the idea of hop-on hop-off flexibility. The value isn’t just the wineries—it’s the transport, the wine-bag support, and the way the day is run so it doesn’t feel like you’re being rushed.
Book it soon if Pooley’s is a priority. The requirement to pre-book cellar doors (especially Pooley’s) is the one factor that can make or break your ideal plan.
If you want a day that feels organized but still gives you room to enjoy what you like, this is a strong pick from Hobart.
FAQ
How long is the Coal River Wine Hopper?
The tour lasts about 7 hours (approx.).
What time does the tour start, and where does it begin?
It starts at 10:45 am at the Tasmanian Travel & Information Centre, 20 Davey St, Hobart TAS 7000. It ends back at the same meeting point.
What’s included in the tour price?
You get an air-conditioned vehicle and carry-on wine bags.
Is lunch or alcohol included?
No. Lunch and alcoholic beverages are not included.
Do I need to pre-book cellar doors?
Yes. It’s important to pre-book the cellar doors you would like to visit. Pooley’s in particular requires bookings at all times.
How many people are on the tour?
The tour has a maximum group size of 26 participants.
What is the cancellation policy?
You can cancel for free up to 24 hours in advance for a full refund. If you cancel less than 24 hours before the start time, the amount paid is not refunded. The cut-off is based on local time.
More Tour Reviews in Hobart
- Bruny Island Food, Sightseeing, Guided Lighthouse Tour & Lunch
★ 5.0 · 2,989 reviews - Full-Day Guided Bruny Island Tour from Hobart
★ 5.0 · 1,331 reviews - kunanyi/Mt Wellington Explorer Bus- Return Tour (2.5 hours)
★ 5.0 · 1,249 reviews - Hobart: kunanyi/Mt Wellington Explorer Bus Pass
★ 4.8 · 848 reviews - Bruny Island Traveller – Gourmet Tasting and Sightseeing Day Trip from Hobart
★ 5.0 · 786 reviews
Richmond and the Coal River Valley
- Day Tour in Mt. Field, Mt. Wellington, Bonorong Wildlife Sanctuary and Richmond
★ 5.0 · 735 reviews - Hobart: Mt Wellington, Mt Field, Bonorong and Richmond Trip
★ 4.8 · 722 reviews - Wineglass Bay & Freycinet NP Full Day Tour from Hobart via Richmond Village
★ 5.0 · 476 reviews - Hobart: Wineglass Bay, Freycinet Park, and Richmond Tour
★ 4.8 · 371 reviews - Hobart: Port Arthur, Richmond & Tassie Devil – Active Tour
★ 4.8 · 351 reviews
The Tasmanian Wine and Whisky Trail
- Valleys of Vino Full Day Tour
★ 5.0 · 365 reviews - Tasmanian Premium Wine Tour with Tasmanian Cheese Platter
★ 5.0 · 137 reviews - 7- 8 Hour StelaVino Guided Wine Tours From Hobart, Tasmania
★ 5.0 · 136 reviews - Hobart Half Day Wine and Food Tour
★ 4.5 · 80 reviews - Private Wine and Beverage Tours in Tasmania
★ 5.0 · 66 reviews
Just Added: Fresh Hobart and Tasmania Reviews





Richmond Village & Coal River Valley, compared.
 ★ 5.0Day Tour in Mt. Field, Mt. Wellington, Bonorong Wildlife Sanctuary and RichmondFrom $128735 reviews
 ★ 4.8Mt Wellington, Mt Field, Bonorong and Richmond TripFrom $126722 reviews
 ★ 5.0Wineglass Bay & Freycinet NP Full Day Tour from Hobart via Richmond VillageFrom $121476 reviews
 ★ 4.8Wineglass Bay, Freycinet Park, and Richmond TourFrom $119371 reviews
 ★ 4.8Port Arthur, Richmond & Tassie Devil – Active TourFrom $138351 reviews
 ★ 4.8Port Arthur, Richmond & Tasman Peninsula Active TourFrom $120225 reviews
 ★ 5.0Port Arthur, Richmond & Tasman Peninsula Active Day TourFrom $121158 reviews
 ★ 4.5Port Arthur, Richmond and Tassie Devils Active Tour from HobartFrom $139128 reviews
Browse the lists this tour appears in